Recently, Microsoft added some extra features to the IoTHub routing abilities:
- Support for routing using the message body
- Support for Blob Storage as endpoint
In this blog, we will look at both features using the Visual Studio 2017 extension called the IoT Hub Connected Service, which is updated also.
But first, let’s look at the new Blob Storage endpoint.
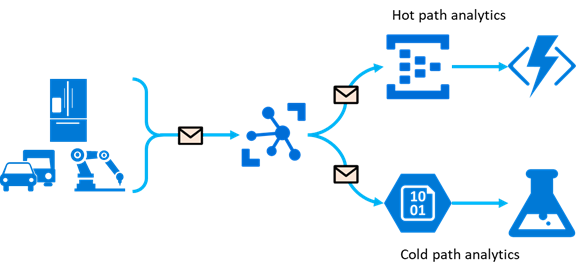
Sending telemetry to a Blob Storage container is a simple and efficient way for cold path analytics:
Until recently, there were a few ways to do this:
- Sending IoTHub output to a Stream Analytics job, which filled some blob
- Sending IoTHub output to an Azure Function, which filled some blob
- Making use of the IoT Hub ability to receive blobs
The first two ways can be done using extra Azure resources so additional costs are involved. The third one is only used in very specific circumstances.
The new Blob Storage endpoint is a simple but very powerful way of making Cold path analytics available, right from the IoTHub.
Let’s check out this new Endpoint feature.
Adding the new endpoint
Here, a list of all available types of endpoints is shown:

We can now add a Blob Storage endpoint:
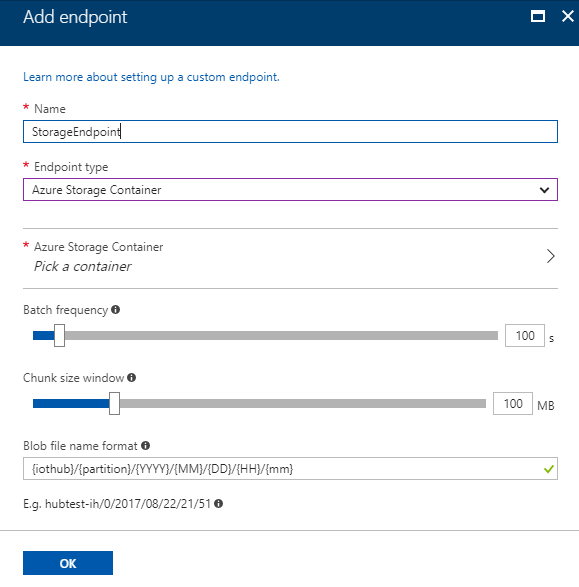
Check out the features: batch frequency and chuck size windows, which comes first? When the requirement is met (size of time interval or messages) the file is saved using a certain naming format.
Also, that name format can be altered.
Note: The format of the data in the saved file is not changeable, it will be AVRO according to this page.
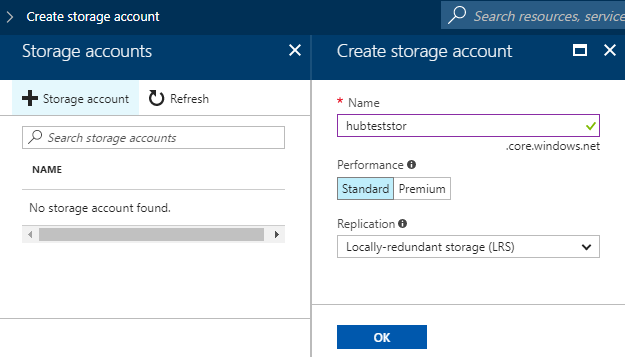
So we need an Azure Storage account to persist the blobs in. I have to add a new account here:
And we have to identify the Blob Storage container. I have to add a new container:

Per container and/or blob, you can change the access level:

I have chosen anonymous read access, so a data scientist can access it easily during the development of her R scripts…
Finally, the container is created and we can select that container:

The IoT Hub is updated, the endpoint is added to the list:

Creating the new route
Now, we add the new route. We select the endpoint and we add the query string.
You can query both on the context properties of the message. But recently, we can also filter using the message body.
We are interested in messageId, part of the message body. So we specify this using the documentation:

We can even check out the route, before we save it, using an altered body in the example message and the Run button… The result says it’s a match!
When we save the route, it takes some time before the IoTHub is updated:

After that, we check out the blob container. It is already created, but still empty (no blobs found):

Creating a UWP device client
We are now ready to create a UWP client which connects to the IoT Hub. Let’s start some coding!
First, we create a Blank app based on Universal Windows in Visual Studio 2017.
We add some XAML for a button to be clicked. Add this Stack Panel to the main form:
<StackPanel>
  <RepeatButton Name="btnClick" Content="Send message"
                Click="btnClick_Click" Delay="500" Interval="100" />
</StackPanel>
Now we have a repeat button which we can hold and sent telemetry repeatedly.
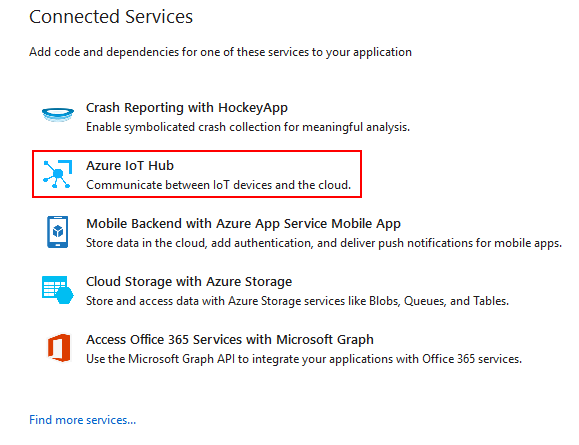
Next, we create an IoTHub connection within the app using a wizard. Using Visual Studio 2017, use the link to get the updated version of the Azure IoT Hub Connected service:

Select the right connected service in the list of available wizards:
Next, connect to your Azure subscription and select which kind of ‘security’ you need. The hardcoded access key is good for now:

If you have a TPM, I can recommend using it.
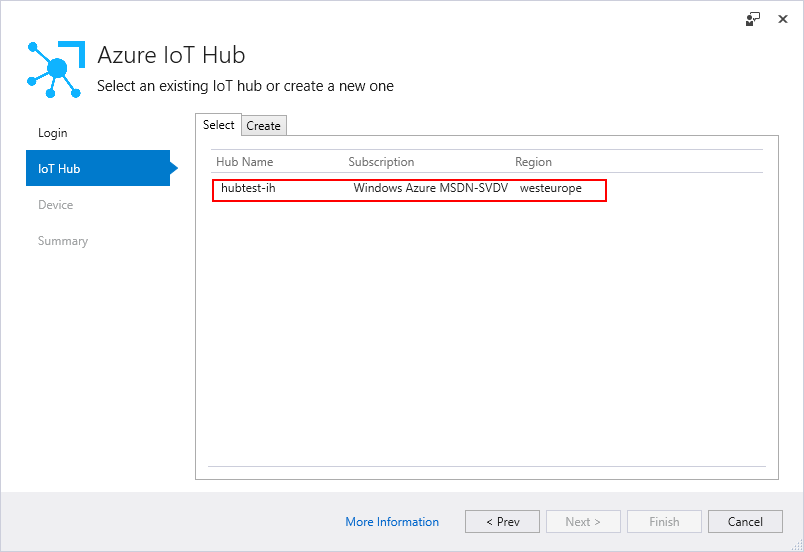
Select a new IoTHub or create one:
We have to represent an actual device. For that, we new a device to be registered in the IoTHub. Here, I create a device first within the IoTHub registration:
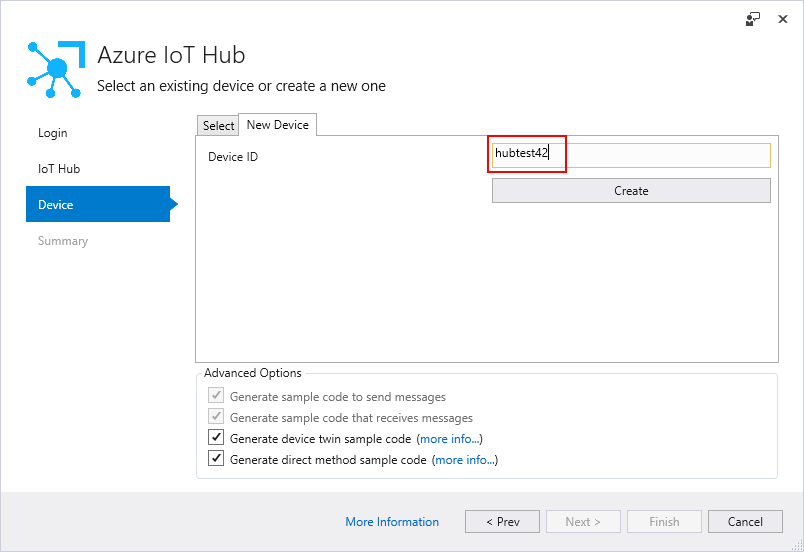
Once the device is registered, I can get access to the IoTHub with some example code. Although we will not touch it here, just add the extra code for device twins and direct methods:

The last chance to check out what will be created:

And the wizard will start creating device client code:

Once created, you will be notified:

A new file ‘AzureIoTHub.cs’ is added
The created class ‘AzureIoTHub’ in ‘AzureIoTHub.cs’ acts like a singleton.
Note: This is one of my favorite changes I see updated in the wizard. The previous version connected and disconnected to the IoTHub every time a message was sent.
Now, the internal static ‘deviceClient’ is reused:
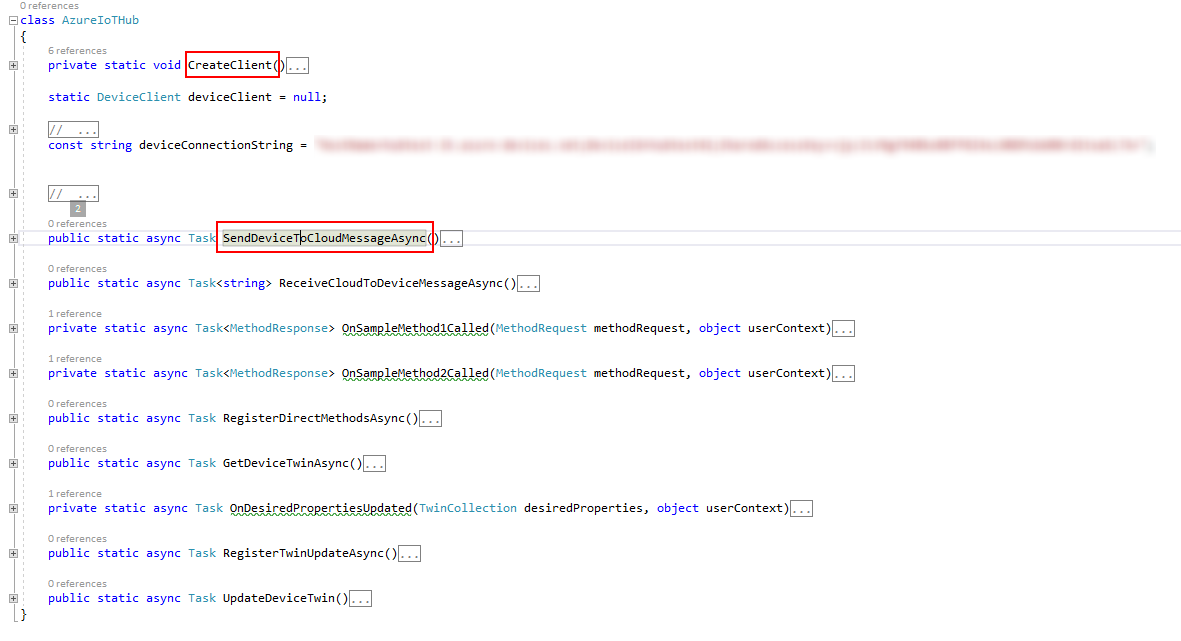
We will use the ‘SendDeviceToCloudMessageAsync’ method to send a message like ‘{“deviceId”:”hubtest42″,”messageId”:1,”text”:”Hello, Cloud from a UWP C# app!”}’:
private async void btnClick_Click(object sender, RoutedEventArgs e)
{
  await AzureIoTHub.SendDeviceToCloudMessageAsync();
}
But before we start our app, we need to fix one thing in the generated AzureIoTHub.cs. When we send the telemetry, we need to specify the ‘Content encoding’ and the ‘Content type’:
public static async Task SendDeviceToCloudMessageAsync()
{
  CreateClient();

  var str = "{\"deviceId\":\"hubtest42\",\"messageId\":1,\"text\":\"Hello, Cloud from a UWP C# app!\"}";

  var messageBytes = Encoding.UTF32.GetBytes(str);

  using (var message = new Message(messageBytes))
  {
    message.ContentEncoding = "utf-32";
    message.ContentType = "application/json";

    await deviceClient.SendEventAsync(message);
  }
}
Note: Are these properties (‘ContentEncoding’ and ‘ContentType’) not available yet in your Message class? Make sure you are using a recent NuGet package of ‘Microsoft.Azure.Devices.Client’. I use version 1.5.0.
Now, you are ready to compile and execute your UWP Device app:

Sending telemetry
You can start sending telemetry now. Just press the button a few times.
Note: I was hoping to see my telemetry was shown in a Device Explorer, but it was kept empty… On the other hand, I do not want to see the telemetry arrive in the $Default Consumer group so this is actually promising:

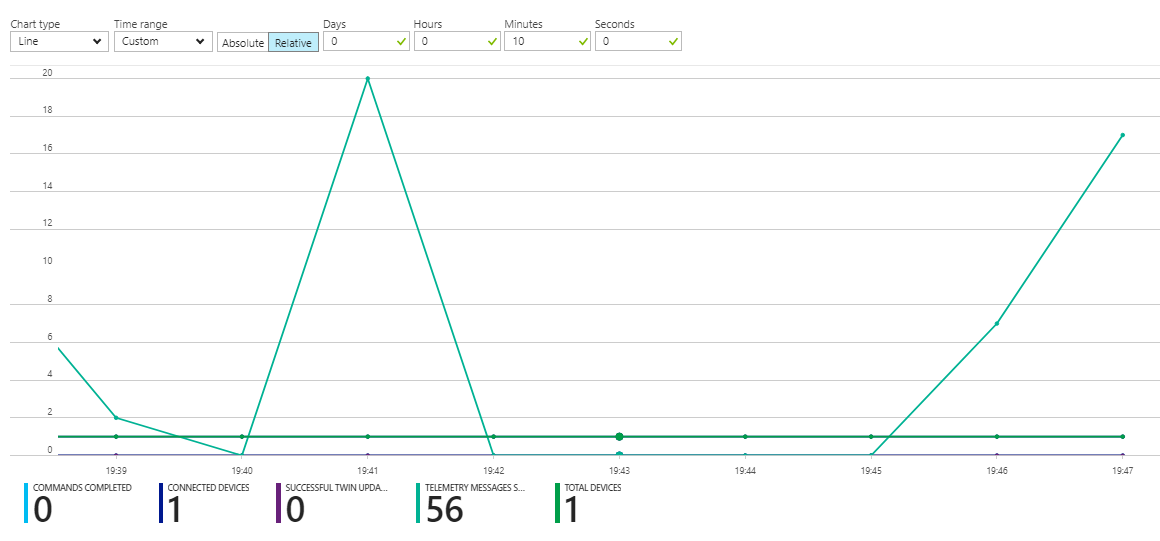
If I check the metrics of the IoTHub (you can scale it down to the last 10 minutes) I actually see the messages arrive:
But will these messages be put in the blob storage?
Yes, the blob container is filled with a file:
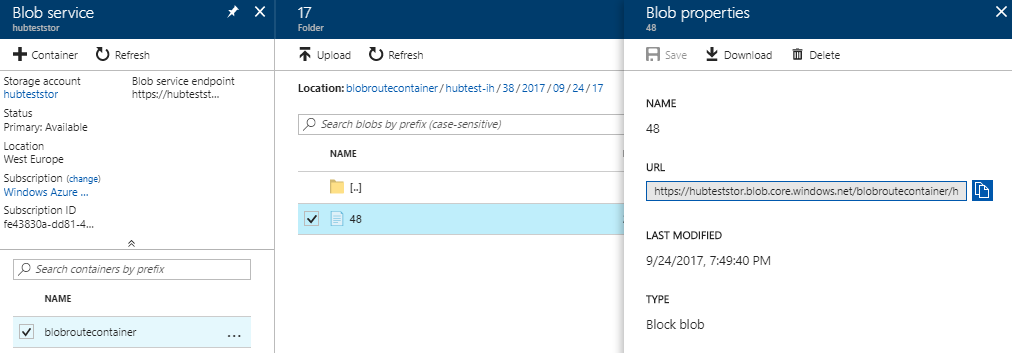
And if we check the content, we see this input:

OK. Yes, it’s the AVRO format so it’s not quite human-readable.
But we have touched a lot of new and updated techniques in just a few minutes.
Conclusion
It was quite easy to fill a Cold path Blob Storage account. and it saves both time and Azure resources.
Personally, I would like to see the message body routing support in the generated ‘AzureIoTHub’ class in the device client UWP app. And I would like to see support for other formats than AVRO in the Blob Storage endpoint like ‘CSV’ or ‘JSON’ (just like the options in the Azure Stream Analytics Blob storage sink).
