Oauth graph usage in Azure Mobile Services

Azure Mobile Services supports two.. no, three kinds of security.

First it support no security. Right 🙂

Second, it support basic authentication. This can be configured using the application key or the master key generated for the service. The application key is used typically for applications (hence the name) and the master key (aka the admin key) is more for a B2B solution. This master key is not to be communicated over the internet or stored in clients.

gr02

And the last kind of security is based on OAuth. This blog is dedicated to this kind of authentication. I will show you how to take advantage of the claims of each Oauth provider. But first: how does it work?

gr01

The foundation is that a secured AMS does provide access for users with an existing account from Google, Facebook, Microsoft, Twitter or Azure Active directory. But we do not want to be involved in the login process of these providers. We are only interested in the fact that the user consuming our services is known and authenticated.

So first we register our app for all providers we want to support in our app. In exchange, from each provider, we get some secret codes we do not share with anyone.

And we both exchange some endpoints between our service and the provider so they can check user specific knowledge if one passes by. AMS has already everything in place for easy configuration in the portal (more details can be found at http://azure.microsoft.com/en-us/documentation/articles/mobile-services-dotnet-backend-windows-universal-dotnet-get-started-users/).

There is one catch… If a user is authenticated, the only thing we know about this user is: nothing; well, almost nothing; only a unique number and some almost meaningless token. Should it be nice to know at least the name of the user and the email address? This a called: scope. And there are several kinds of scopes. Eg. if you want to know the friends of the user in Facebook, you have to request the scope for it.

So finally we declare the scope of data access we are interested in. We want the email address of the user logging in, so Facebook and MSFT ask use to declare the email scope. This is done in the configuration of the service in the portal.

Then a user comes by and accesses our service when using our app.

Because we do not want to know anything regarding to passwords, we redirect the user to the specific provider the user has chosen. In the client app, the provider redirects to a login screen (so the user can enter her/his name and password, to be confirmed by the provider) and the provider shows a consent screen so the uses is shown what scope our service is interested in. This is actually just the scope we provided. So in this example eg. Facebook will tell the user that he or she is about to disclose their email address. So as a service, do not ask too much of a user will deny you everything.

Finally the user logged in gets that (almost) useless token and this token (just a very long piece of gibberish) is passed to the service which will ask the provider for confirmation the token is correct (this user is logged in and has given his/her consent).

We only have this token, nothing more. Although the token contains some information (see https://sandervandevelde.wordpress.com/2015/02/10/getting-the-token-expiration-date-in-azure-mobile-services/) it does not contain the information we hoped for when we defined the scope. You will not find an email address in the token.

How do we get the information we asked for?

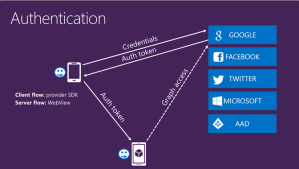
As seen in the image at the top of this blog, we can access the ‘graph’ for each provider. It’s just an extra endpoint of the provider service.

In the following paragraphs I will show you how to call the graph for several providers

Facebook graph access 

When registering our app at Facebook, we get a secret combination of the keys. Put them in the Identity settings:

gr03 gr04

If we want to access Facebook to get the email address, we have to pass the extra scope request. So put a line in the app setttings:

gr04

Finally access the graph of Facebook using this WebApi call on the server.

gr05

The response gotten from the request at the graph endpoint is just json so we can transform it to the following class:

gr06

So here we have the name and the email address of the user from Facebook.

Microsoft

Just like Facebook, also a Microsoft account requires an extra scope for the email:

gr10msft

And the request to the graph is almost similar:

gr09msft-server

The difference is the number of different email addresses we get back from Microsoft:

gr09msft-server2

You control their destiny, so choose wisely…

Google

For getting graph data from Google we need nothing special. Just call the end point:

gr11google

And the claims are almost the same too. Also notice the picture url:

gr12google

Twitter

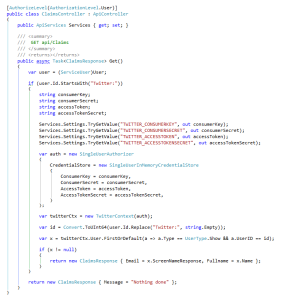
Accessing Twitter is not easy. It is painful and difficult. It involves extra encodings and ugly coding. But I took the liberty to ask for some help. And the nugget package Linq To Twitter came to the rescue. First we added four secret values we got from Twitter to the App Settings in the portal. Then we consumed them during the call to the graph of twitter:

gr13twitter

This is pretty code indeed. Good job Linq To Twitter! And because this library does all the json conversion, we do not need another class for mapping the answer.

Twitter does not pass the email address. We can get the unique twitter handle.

Azure Active Directory AAD

This is my favorite provider. Why? It’s because we can access every other AD in the world using AAD if there is a trust between them. For this example I just created a new user directly into AAD.

So first lets call the service. It is already explained in http://azure.microsoft.com/nl-nl/documentation/articles/mobile-services-dotnet-backend-windows-store-dotnet-aad-graph-info/ , but not after some extensive email conversation with Wesley McSwain from Microsoft.

Just like with Twitter, we need to have access to three secret values provided by AAD. We access them from the App settings:

gr14aad

This actually is a large amount of code. Luckily most of it is just the description of the large class the AAD json response has to be mapped to.

Please notice several things. First of all the address of the endpoint is having a version number in it (a date). It has changed in the past and it will most certainly change in the future. And the email address of the user was not passed in the ‘mail’ property. I got it in the UserPrincipalName. So check your own response!

Conclusion

It is not easy to access the graphs, but it can be done. Here I only took the time to get the email address of the user. Check the response of the different graphs if you access other scopes.

Do it end with these providers? No, take a look at http://azure.microsoft.com/blog/2014/07/28/azure-mobile-services-net-updates/ for an example on how to support LinkedIn.

Adding New Relic to Azure Mobile services

Do you know New Relic? This is what they see about themself: “New Relic is a Software Analytics company that makes sense of billions of metrics across millions of apps. We help the people who build modern software understand the stories their data is trying to tell them.”

Back at the Teched 2014 in Barcelona it was demonstrated in one of the sessions about Azure Mobile Services. I have implemented it in my Azure Mobile Services and it gives me (unexpectedly) a lot of information about my services and even more important, the instances it runs on or the database that is called by the service. Very impressive!

For those who use Google Analytics; it’s like that, but bigger 🙂

And the best news about New Relic is that they have a free account pricing also. If you have an MSDN account, you can get a New Relic account for free using the Azure Portal and the Marketplace:

nr01

The nice thing is that the New Relic portal is integrated into the Azure portal. No extra login needed. So get that account and more important, get the license key. You can always find it under the connection info button on the New Relic tab.

nr02

So we have an account, what do you have to do to install New Relec in our service? If you have a NodeJs backend, just follow http://azure.microsoft.com/en-us/documentation/articles/store-new-relic-mobile-services-monitor/ . Just fill in the key.

But if you are using the .Net backend, a bit more work has to be done.

First get your hands on the sourcecode of the .Net service backend. You can download it from the portal if needed. You are a developer, you will find it 🙂

In the project of the Azure Mobile Service, add a Nuget package for NewRelic. Search on ‘NewRelic.Azure.Websites’ and see will see there are two packages:

nr03

There is a x86 and a x64 version. The x86 works fine too,  You choose.

And… you are done for the changes.

Offtopic: the name of the Nuget package seems to indicate that this could also be used in regular Azure Webservices. Hmm, I tried it but failed first. Then I changed from the X64 to the X86 Nuget package and I was lucky. But maybe it was just the hard reset of the Azure Webservice in the Azure Portal…

Now just publish the updated service to Azure.

Next step is to go back to the portal. Add the next configuration settings:

  • NEWRELIC_LICENSEKEY = <your key here>
  • COR_ENABLE_PROFILING = 1
  • COR_PROFILER = {71DA0A04-7777-4EC6-9643-7D28B46A8A41}
  • NEWRELIC_HOME = d:\Home\site\wwwroot\newrelic
  • COR_PROFILER_PATH = d:\Home\site\wwwroot\newrelic\NewRelic.Profiler.dll

You noticed the key had to be entered? This is the only change you have to make.

Update: There seems to be a new feature in the Configure page of the portal: developer analytics. In the dropdown provided, NewRelic should be available. When selecting it, all above settings are added at once. A restart could be needed.

nr12

Now you are ready to start using the Azure Mobile Service by running the app and consuming the services. Everything will be monitored. Just wait for a few minutes (or even seconds) and the metrics will be visible.

Here are some examples of what is monitored:

Response time:

nr06

Slowest transactions:

nr07

Server response time, througput, CPU usage and Memory usage:

nr08

Slowest transactions on the database:

nr09

Database server transactions, response time and throughput:

nr11

So you see, very impressive. My advise is to play with it, especially during the development of the service.

More details are also seen on Channel9: http://channel9.msdn.com/Shows/Cloud+Cover/Episode-121-New-Relic

Do you have the same or another thoughts about NewRelic? Please share you experiences.

Getting the token expiration date in Azure Mobile Services

Azure Mobile Services support storing the Oauth user credentials token in the PasswordVault of the OS a client app is running in. This is supported in Windows Universal apps, Xamarin, etc.

See here for the details regarding user credentials from the AMS documentation.

And this is a good thing, now the user does not have to supply the Oauth credentials every time the app is started. We can check if the vault contains the credentials we need and this saves a round trip to the server and an extra input screen. If it is not in the vault, just let the user login using Facebook, Google etc.  and store the token.

But wait: these stored credential tokens are not valid until the end of times. For example, Google credentials are valid for 30+ days. After that, the token stored in the vault is worthless.

Therefor, in the AMS example above a simple check is done by calling the AMS service with a trivial request:

...
try 
{ 
  // Try to return an item now to determine if the cached credential has expired. 
  await App.MobileService.GetTable<TodoItem>().Take(1).ToListAsync();
               // <<-- WHY??? 
} 
catch (MobileServiceInvalidOperationException ex) 
{ 
  if (ex.Response.StatusCode == System.Net.HttpStatusCode.Unauthorized) 
  { 
    // Remove the credential with the expired token. 
    vault.Remove(credential); credential = null; continue; 
   } 
}
...

Here a simple GET is done to check the validity of the token. If it is not valid, it is deleted and the user must login again.

But this is a web call I do not like.

This is done every time user logs in / starts the app, even in an offline scenario!

In an offline scenario I am not even interested in the expiration date…

Is there a better way?

Well, what we get from the Oauth providers, when the user logs in successfully, is a Json Web Token (JWT). And this token can be decoded following the JWT specifications.

This will result in something like:

public class Token
{
    [JsonProperty(PropertyName = "ver")]
    public string Ver { get; set; }
 
    [JsonProperty(PropertyName = "uid")]
    public string Uid { get; set; }
 
    [JsonProperty(PropertyName = "exp")]
    public string Exp { get; set; }
 
    [JsonProperty(PropertyName = "nbf")]
    public string Nbf { get; set; }
 
    [JsonProperty(PropertyName = "aud")]
    public string Aud { get; set; }
}

This token is available on the server as:

App.MobileService.CurrentUser.MobileServiceAuthenticationToken

And the token can be decoded using a Nuget package. The only drawback is that this package is not available on the Universal apps client, only on the Azure Mobile Services server, the backend.

So I wrote this extra API controller:

public class DecodeExpirationController : ApiController
{
  public ApiServices Services { get; set; }
 
  // GET api/DecodeExpiration
  [AuthorizeLevel(AuthorizationLevel.User)]
  public DateTime? Get(string token)
  {
    string adminKey;
 
    if (!Services.Settings.TryGetValue("ADMIN_KEY", out adminKey))
    {
      return null;
    }
 
    try
    {
      var jsonPayload = JWT.JsonWebToken.Decode(token, adminKey, false);
 
      var result = JsonConvert.DeserializeObject<Token>(jsonPayload);
 
      var startOfUtcCount = 
        new DateTime(1970, 1, 1, 0, 0, 0, 0, DateTimeKind.Utc);
 
      var expirationDate = startOfUtcCount.
                             AddSeconds(Convert.ToInt32(result.Exp));
 
      return expirationDate;
    }
    catch (JWT.SignatureVerificationException)
    {
      return null;
    }
    catch (Exception ex)
    {
      return null;
    }
  }
}

Note the level of authorization, the user should be logged in by now…

And we can call this WebApi GET on the client:

try
{
  var parameters = new Dictionary<string, string>();
  parameters.Add("token",
    App.MobileService.CurrentUser.MobileServiceAuthenticationToken);
  var result = await App.MobileService.
        InvokeApiAsync<DateTime?>("DecodeExpiration", HttpMethod.Get, parameters);
 
  message = result.HasValue ? result.Value.ToString() : "Nothing returned.";
}
catch (Exception ex)
{
  message = "Exception: " + ex.Message;
}

This should work using with every provider.

The Admin Key is coming from the portal. I have added this appsetting to the configuration of the AMS.

Using this call we get the UTC time of the token expiration date. So store this on the client and check this value every time (give or take a few hours due to correct daylight savings when applicable).