SignalR is easy in Azure Mobile Services

SignalR is a great way for adding (semi) real-time communication technology to your applications and apps. It is open sourced and it is based on industry standards like HTML5 WebSockets.

It makes it possible to send messages from one client to all other clients (or a selection of them) in real-time. Or you can send messages back from the server to (a selection of) clients.

Think about that. How could you use this in your app? Add some chat functionality, automatic refreshing or push notification in your website or app? There are multiple client SDK’s available so use it so It could work in your app!

And SignalR has some tricks for older browsers or bad connections. So it will always try to communicate in the best possible ways. But in that case, the communication will be less (semi) live…

sr01

As you can see in the picture, each client is connected to one server when they make contact for the first time. They will try to hold this connection during the session for as long as possible. Websockets technology is optimized to send almost no data over the line as long as the connection is open so it’s very cheap in usage and the server load is still acceptable. The fall-back techniques like Ajax long polling is not that much optimized.

The only drawback in this picture is scaling. If you use multiple servers, messages received from a client on one server have to be transmitted to clients on the other servers also. For that, you need a backplane. This could be a message bus, for example. Normally you have to design and build your own backplane (see the wiki for in-depth information) or you can use Azure Mobile services. With AMS, this backplane is already available.

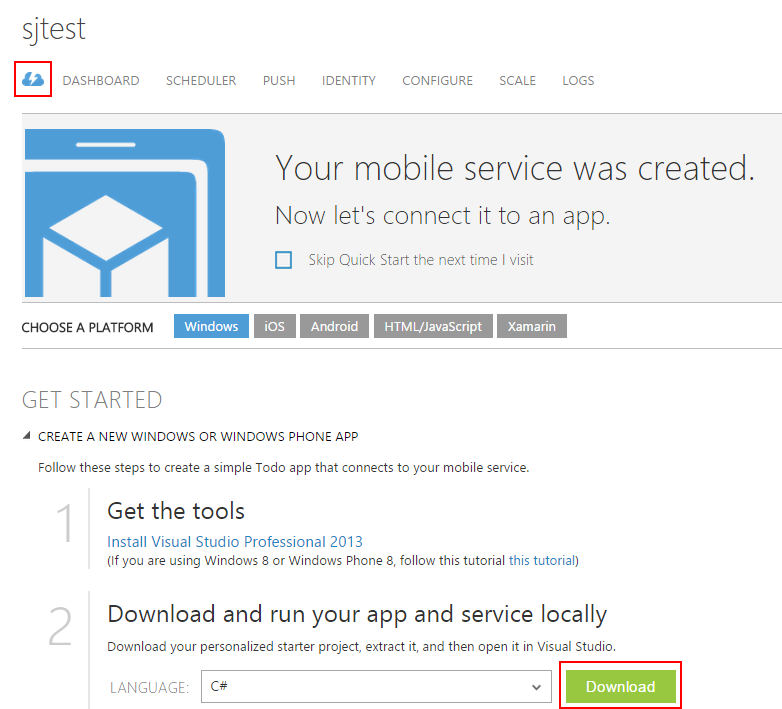
To get started with SignalR on AMS, just start a new AMS service in the portal and directly download the code generated for the service and two example clients (Windows universal app and Windows Phone ) from the portal.

And after compiling and testing the app (just to see if it is connected to Azure and working), add some Nuget packages both to the service and the clients. Use these Nuget package commands:

  • Install-Package WindowsAzure.MobileServices.Backend.SignalR
  • Install-Package Microsoft.AspNet.SignalR.Client

In the service, we need a simple initialization of SignalR when that service is activated. Add the following line in the Register method in the WebApiConfig.cs class:

  • SignalRExtensionConfig.Initialize();

So it should look like this:

sr02

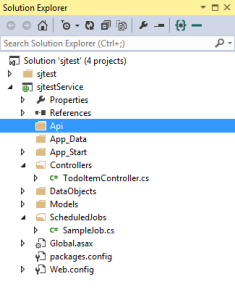
The only thing more that has to be done server-side is adding the actual logic to interact with. So add a map to the service project file tree and call it something like SignalR. And inside that map, add a SignalR hub:

sr03

This hub is the actual logic behind the SignalR endpoint. And it does multiple things…

Most importantly, the Send method can be called by any client. And doing so, the message passed will be broadcasted to all clients (including the caller).

And we assume on each client a method will be available and it will be named something like broadcastMessage. This is written with the first character in lower case (this is called camel casing) because the method will be written on the (browser) client, like JavaScript notation.

We also react to people connecting and disconnecting. We add the unique context id in a list so we know how many clients at any moment are connected. And when somebody connects or disconnects, all clients will receive a message informing them who joined or left.

We are now ready on the server. Deploy the server to Azure.

So the only thing we need to do now is actually consuming Azure Mobile Services SignalR on the client.

I added an extra XAML page to the Windows Store client and I added a broadcast button (which will connect the first time I hit it) and a disconnect button. When the app is running and we have broadcasted, it will look like:

sr04

The code behind the buttons is not that hard to understand also:

sr05

First of all, we need the HubConnection instance. It is created when we call ConnectToSignalR. See we also added some delegate methods to the  Error and SlowConnection events. And we create a proxy for the hub on the server and we establish the communication for broadCastMessage.

So now we can Connect and disconnect from the hub using the Hub connection, we can receive messages broadcasted by the server and we can send messages to the server.

Just play with it and deploy the app on multiple devices.

With this basic SignalR example, we have put already a lot of power in the client and service. And this solution is already scalable on the server by the automatically generated Backplane.

Push notification for groups of users in Azure Mobile Services

Push notification is one of the most important features of mobile apps. Users use it a lot and take it for granted that you incorporate this feature in your app. But underneath the apparently realtime popup/toast of a message, lives a whole system of providers and notification hubs to make that possible.

p01

First of all, there are three major notification providers: Google, Apple and Microsoft. It looks like pushing message to all three stores is hard but AMS makes it easy.

In this example we push to a Windows Store app (part of the default generated AMS example solution). But It’s almost the same on eg IOS or Android. Apart from the client code which differs on each platform (See http://azure.microsoft.com/en-us/documentation/articles/mobile-services-dotnet-backend-windows-phone-get-started-push/ for different client support) the AMS server code is all the same.

Coding! Let us start with the first, most important step: reserve your future app name in the store of choice. In return you will be granted some secret key(s) which you have to use for push notification to the users of your app.

Fill these secret keys in on the Push tab in the Azure Mobile Services portal. There is plenty of room for all the settings (Facebook, Google, MSFT). There is rather no push notification from Twitter 🙂

p02

So let’s add some code in the service which will push messages. In this example I push a notification if a note is inserted in the database by the default available TableController (part of the generated code when the service was created initially).

p03

Although this is an example using a WNS native toast, it is clear we only have to define the message and we have to push it once. AMS will take the message and distribute it over all the notification hubs configured.

Did you notice the “DATABASE” tag? I have given this message a conditional tag. So only clients which are registered (interested) for messages with this tag, will receive it. It should be possible to send one message specifically to one user!

So now let’s go to the client, because we want to receive that message. We have to register for push messages.

p04

Here we do a couple of things. First we unregister for any tags we could be registered to already. This is nice if the tags change often. Afterwards we register for the messages with tag “DATABASE”. We can enter any amount of tags but for now it’s this one.

Why do we register? Because the push notification messages will be shown, whether we are using the app (it is currently opened, in use) or we are not. As long the app is installed on the machine (and run once), push notification from that app could reach us. And if so, if the user tabs on the toast, the app will be instantiated (if not already open).

But maybe you do not want the notification to be shown while the app is open. Or you want to present it in a whole new way (with sound of something blinking). That’s why I added the event handler and added the function.

Inside that function I can parse the message and decide if I want to show it the regular way or not (using the args.Cancel).

So call the Initialize function when you know which kinds of messages you want to receive. Or omit the tag if you want them all 🙂 I have put it inside the Onlaunched event in app.xaml.cs.

But there is still one thing to do!

We must have permissions from the user to receive push notification for our app. Or at least, the user must be made aware of the fact we are using push notifications. This is done with the ‘toast capability’. Double-click the Package.appxmanifest in the Windows Store app, and on the application tab, select Yes for Toast Capable!

p05

And this is all there is to tell about Push Notification support (at least the most important part).

Start the AMS app and insert a Todo Item. Within minutes, usually seconds or mostly within a second, a popup will appear.

p08

Is this cool or not?

Push notification is part of all versions of Azure Mobile Services. But the free version has some restrictions (What do you expect? It’s free…) See the pricing for more information.

Oauth graph usage in Azure Mobile Services

Azure Mobile Services supports two.. no, three kinds of security.

First it support no security. Right 🙂

Second, it support basic authentication. This can be configured using the application key or the master key generated for the service. The application key is used typically for applications (hence the name) and the master key (aka the admin key) is more for a B2B solution. This master key is not to be communicated over the internet or stored in clients.

gr02

And the last kind of security is based on OAuth. This blog is dedicated to this kind of authentication. I will show you how to take advantage of the claims of each Oauth provider. But first: how does it work?

gr01

The foundation is that a secured AMS does provide access for users with an existing account from Google, Facebook, Microsoft, Twitter or Azure Active directory. But we do not want to be involved in the login process of these providers. We are only interested in the fact that the user consuming our services is known and authenticated.

So first we register our app for all providers we want to support in our app. In exchange, from each provider, we get some secret codes we do not share with anyone.

And we both exchange some endpoints between our service and the provider so they can check user specific knowledge if one passes by. AMS has already everything in place for easy configuration in the portal (more details can be found at http://azure.microsoft.com/en-us/documentation/articles/mobile-services-dotnet-backend-windows-universal-dotnet-get-started-users/).

There is one catch… If a user is authenticated, the only thing we know about this user is: nothing; well, almost nothing; only a unique number and some almost meaningless token. Should it be nice to know at least the name of the user and the email address? This a called: scope. And there are several kinds of scopes. Eg. if you want to know the friends of the user in Facebook, you have to request the scope for it.

So finally we declare the scope of data access we are interested in. We want the email address of the user logging in, so Facebook and MSFT ask use to declare the email scope. This is done in the configuration of the service in the portal.

Then a user comes by and accesses our service when using our app.

Because we do not want to know anything regarding to passwords, we redirect the user to the specific provider the user has chosen. In the client app, the provider redirects to a login screen (so the user can enter her/his name and password, to be confirmed by the provider) and the provider shows a consent screen so the uses is shown what scope our service is interested in. This is actually just the scope we provided. So in this example eg. Facebook will tell the user that he or she is about to disclose their email address. So as a service, do not ask too much of a user will deny you everything.

Finally the user logged in gets that (almost) useless token and this token (just a very long piece of gibberish) is passed to the service which will ask the provider for confirmation the token is correct (this user is logged in and has given his/her consent).

We only have this token, nothing more. Although the token contains some information (see https://sandervandevelde.wordpress.com/2015/02/10/getting-the-token-expiration-date-in-azure-mobile-services/) it does not contain the information we hoped for when we defined the scope. You will not find an email address in the token.

How do we get the information we asked for?

As seen in the image at the top of this blog, we can access the ‘graph’ for each provider. It’s just an extra endpoint of the provider service.

In the following paragraphs I will show you how to call the graph for several providers

Facebook graph access 

When registering our app at Facebook, we get a secret combination of the keys. Put them in the Identity settings:

gr03 gr04

If we want to access Facebook to get the email address, we have to pass the extra scope request. So put a line in the app setttings:

gr04

Finally access the graph of Facebook using this WebApi call on the server.

gr05

The response gotten from the request at the graph endpoint is just json so we can transform it to the following class:

gr06

So here we have the name and the email address of the user from Facebook.

Microsoft

Just like Facebook, also a Microsoft account requires an extra scope for the email:

gr10msft

And the request to the graph is almost similar:

gr09msft-server

The difference is the number of different email addresses we get back from Microsoft:

gr09msft-server2

You control their destiny, so choose wisely…

Google

For getting graph data from Google we need nothing special. Just call the end point:

gr11google

And the claims are almost the same too. Also notice the picture url:

gr12google

Twitter

Accessing Twitter is not easy. It is painful and difficult. It involves extra encodings and ugly coding. But I took the liberty to ask for some help. And the nugget package Linq To Twitter came to the rescue. First we added four secret values we got from Twitter to the App Settings in the portal. Then we consumed them during the call to the graph of twitter:

gr13twitter

This is pretty code indeed. Good job Linq To Twitter! And because this library does all the json conversion, we do not need another class for mapping the answer.

Twitter does not pass the email address. We can get the unique twitter handle.

Azure Active Directory AAD

This is my favorite provider. Why? It’s because we can access every other AD in the world using AAD if there is a trust between them. For this example I just created a new user directly into AAD.

So first lets call the service. It is already explained in http://azure.microsoft.com/nl-nl/documentation/articles/mobile-services-dotnet-backend-windows-store-dotnet-aad-graph-info/ , but not after some extensive email conversation with Wesley McSwain from Microsoft.

Just like with Twitter, we need to have access to three secret values provided by AAD. We access them from the App settings:

gr14aad

This actually is a large amount of code. Luckily most of it is just the description of the large class the AAD json response has to be mapped to.

Please notice several things. First of all the address of the endpoint is having a version number in it (a date). It has changed in the past and it will most certainly change in the future. And the email address of the user was not passed in the ‘mail’ property. I got it in the UserPrincipalName. So check your own response!

Conclusion

It is not easy to access the graphs, but it can be done. Here I only took the time to get the email address of the user. Check the response of the different graphs if you access other scopes.

Do it end with these providers? No, take a look at http://azure.microsoft.com/blog/2014/07/28/azure-mobile-services-net-updates/ for an example on how to support LinkedIn.

Adding custom WebApi controller to Azure Mobile Services

Azure Mobile Services supports multiple ways to exchange data with client apps.

A very powerful way is WebApi. It’s just the same solution as the WebApi found in Asp.Net (MVC), it just another endpoint which can exchange JSON messages in a Restful consumption format. The WebApi supports Get, Post etc.

But if we look at the two flavors of AMS, the JavaScript back-end and the C# backend, the first one is configured in another way compared to the last one. In the Web portal of the JavaScript version, the logic can be added as a script.

cwa01

The users of the C#  backend do not have this opportunity. The API tab is completely missing. How do you add some WebApi controller?

cwa02

Well, just as with all logic to be added to the C# service, open the Azure Mobile Service solution in visual studio. And although there is a map named Controllers (containing a sample TableController), just add an extra map named API.

cwa03

Then right-click the map and select sub-menu Add | Controller, just like in Asp.Net MVC.

cwa04

And there we have a broad selection of possible controllers. Let’s ignore the TableController and let’s compare the Microsoft Azure Mobile Services Custom Controller with the Web API 2 controller. So select the first one and add it.

cwa05

Although the map named API was selected, the new controller is added to the Controllers map.

cwa06

A full working example was generated. So if we look at the code of the custom controller, we see the extra property named Services.

cwa07

This property gives us the possibility to access some features of the Azure Mobile Service in runtime behavior on the server. Here the code generated by default , adds a message to the server logging.

Let’s look at the other type of template.

Again select the map named API in the Solution explorer. Now let’s add the WebApi 2 controller.

cwa08

This time, the controller is added inside the map selected. That’s promising.

cwa09

So we put a controller outside the map named controllers? Relax, this will work! I like to separate my API controllers from the Table controllers. Somehow (with reflection) the service will find the controllers and make them available. And see, the new controller is derived from the same base class.

But the WebApi 2 controller is pretty empty. so let’s add some logic.

cwa10

Here a few interesting changes are made. First, we see the same property  named Services is added. Because we want to log and this will also give access to information about the user currently doing the call (only if we have user authentication activated), we need this property.

And this controller exposes a POST action, not the default GET.

We receive an integer as a parameter. And we expose a list of custom classes (TestResponse) as a result. We fill the list with one instance and that one contains both the name of the SQL server our data context is using (a reference to System.Data was added) and an integer.

Note that the public properties of the class, used in the result, is having attributes added for the JSON notation.

So deploy the service and check the available help pages for the service for reference.

cwa11

And yes, both API services are available and see that for both the path in the endpoint is the same. Hurray for reflection!

So open up a client XAML page and add a button to consume an API controller.

cwa12

In the onclick event we put the following client code.

cwa13

On the service client, we call the method named InvokeApiAsync and give it information about the API to consume (note the “Controller” part of the controller name is omitted). We specify the kind of call (GET, POST, etc.) and we pass the ID parameter as part of a dictionary with a string key and a string value.

And most important, we specify the result we expect to receive. Therefor, we need to have the same result class client side as we have specified server side. This class is needed so the client instance can map the receiving JSON data on instances of that class.

In this example, the result class is specified again. Of course, it’s better to specify it in one common library and reference that library both on the client and server.

You are ready to consume now. Start the client app and see you receive the API controller result. This result should be a combination of the number 84 and the server name of the database context.

cwa14

In case you see local DB as the database server, you are consuming the localhost version of your Azure Mobile Services service. Close but no cigar 🙂

cwa15

This example will give you a flying start while exchanging data between server and client.

Scheduled Jobs in Azure Mobile Services

Sometimes, what seems to be a simple job can turn out into a not-so-simple job. It’s at that moment, some help is needed. Well, I struggled at adding a scheduled job (where it is? How do I have to add it?) and found out there are some little things to tell about it.

So you have created an Azure Mobile Service and found out it is possible to add scheduled jobs. Good for you! So you went to the Scheduler tab page in the portal?

sj01

And there was no job available yet. But you can create a new job. The free edition of Azure Mobile Services let’s you add one (1) jobs…

sj02

And the scheduler is pretty good, it is simple but quit flexible in the way the job can be scheduled. But after creation, if you try to run it once by hand, an error occurs:

sj03

Hmm, so there is no actual job available? Let’s create one. Go to the tab page ‘in the shape of a cloud’ and see it’s possible to get the actual source code (the C# solution which can be run in VS201x). Just follow the dialog and hit the Download button:

sj04

When the zip is downloaded and extracted, start the solution and just check if you can compile it completely (or get the Azure SDK first and let VS201x pick the Nuget packages while compiling).

The solution is packed with four projects: there are two clients, some shared code and the actual AMS service. We are only interested in the last one. This service project contains a folder called ScheduledJobs.

sj05

This folder already contains a SampleJob but this is not the job we expected. So let us add a new job called NewTestJob. There is no template available in Visual Studio so I just took a copy of the existing job and renamed it. The most important steps are to override the ScheduledJob base class and to take the exact same name as in the portal but with the trailing ‘Job’.

sj06

Just for clarification, this job logs some text in the portal log. You can do whatever you want to program in this job but the log is a nice tool to check if everything works.

After that, start deploying (Right click on the service project in the Solution Explorer and hit Deploy). If needed, attach the code to the AMS declaration (which you have created in the cloud at the beginning).

sj07

If publishing succeeds, you get that smiling blue man group (a smurf taking a selfie using it’s short arms while laying on it’s side?)

sj08

Ok, we are ready for some action. Due to the ‘Convention of Configuration’ the portal now can discover the job. So try to run it once again. This time it should not fail!

sj09

Let’s look at the outcome in the logging. Go to the Logs tab and see a row is added containing the text which is logged by the job (right after the failed attempt).

sj10

So in the end, it turns out it’s very easy to add a scheduled job. Just inherit from the right base class and follow the ‘convention over configuration’ rule.

Real die-hards can check the poral:

sj11

After adding the Master key of the AMS in the password field of the Basic authentication dialog (leave the name field just empty) the job is executed.

sj12

A second line is added to the log. Mission completed.

Adding New Relic to Azure Mobile services

Do you know New Relic? This is what they see about themself: “New Relic is a Software Analytics company that makes sense of billions of metrics across millions of apps. We help the people who build modern software understand the stories their data is trying to tell them.”

Back at the Teched 2014 in Barcelona it was demonstrated in one of the sessions about Azure Mobile Services. I have implemented it in my Azure Mobile Services and it gives me (unexpectedly) a lot of information about my services and even more important, the instances it runs on or the database that is called by the service. Very impressive!

For those who use Google Analytics; it’s like that, but bigger 🙂

And the best news about New Relic is that they have a free account pricing also. If you have an MSDN account, you can get a New Relic account for free using the Azure Portal and the Marketplace:

nr01

The nice thing is that the New Relic portal is integrated into the Azure portal. No extra login needed. So get that account and more important, get the license key. You can always find it under the connection info button on the New Relic tab.

nr02

So we have an account, what do you have to do to install New Relec in our service? If you have a NodeJs backend, just follow http://azure.microsoft.com/en-us/documentation/articles/store-new-relic-mobile-services-monitor/ . Just fill in the key.

But if you are using the .Net backend, a bit more work has to be done.

First get your hands on the sourcecode of the .Net service backend. You can download it from the portal if needed. You are a developer, you will find it 🙂

In the project of the Azure Mobile Service, add a Nuget package for NewRelic. Search on ‘NewRelic.Azure.Websites’ and see will see there are two packages:

nr03

There is a x86 and a x64 version. The x86 works fine too,  You choose.

And… you are done for the changes.

Offtopic: the name of the Nuget package seems to indicate that this could also be used in regular Azure Webservices. Hmm, I tried it but failed first. Then I changed from the X64 to the X86 Nuget package and I was lucky. But maybe it was just the hard reset of the Azure Webservice in the Azure Portal…

Now just publish the updated service to Azure.

Next step is to go back to the portal. Add the next configuration settings:

  • NEWRELIC_LICENSEKEY = <your key here>
  • COR_ENABLE_PROFILING = 1
  • COR_PROFILER = {71DA0A04-7777-4EC6-9643-7D28B46A8A41}
  • NEWRELIC_HOME = d:\Home\site\wwwroot\newrelic
  • COR_PROFILER_PATH = d:\Home\site\wwwroot\newrelic\NewRelic.Profiler.dll

You noticed the key had to be entered? This is the only change you have to make.

Update: There seems to be a new feature in the Configure page of the portal: developer analytics. In the dropdown provided, NewRelic should be available. When selecting it, all above settings are added at once. A restart could be needed.

nr12

Now you are ready to start using the Azure Mobile Service by running the app and consuming the services. Everything will be monitored. Just wait for a few minutes (or even seconds) and the metrics will be visible.

Here are some examples of what is monitored:

Response time:

nr06

Slowest transactions:

nr07

Server response time, througput, CPU usage and Memory usage:

nr08

Slowest transactions on the database:

nr09

Database server transactions, response time and throughput:

nr11

So you see, very impressive. My advise is to play with it, especially during the development of the service.

More details are also seen on Channel9: http://channel9.msdn.com/Shows/Cloud+Cover/Episode-121-New-Relic

Do you have the same or another thoughts about NewRelic? Please share you experiences.