Although I mainly work with Azure IoT Edge solutions, once in a while I program for constrained devices.
These devices are not extending the cloud but devices like the ESP32, are quite powerful in their own way and support wireless communication too.
This makes them perfect for IoT client solutions.
From all client programming platforms, I love to program using the Nanoframework platform the most.
It makes it easy to write C# code for embedded systems so even with limited embedded devices knowledge, developers are successful in building embedded systems.
Last year, I wrote an article about my Azure cloud-connected coffeemaker (a tribute). It was completely written in C#, complete with Azure IoT Hub integration, GPIO, and sound generated by an MP3 player.
For this blog post, I checked out how the Nanoframework can connect to the new MQTT support for the Azure EventGrid namespace:
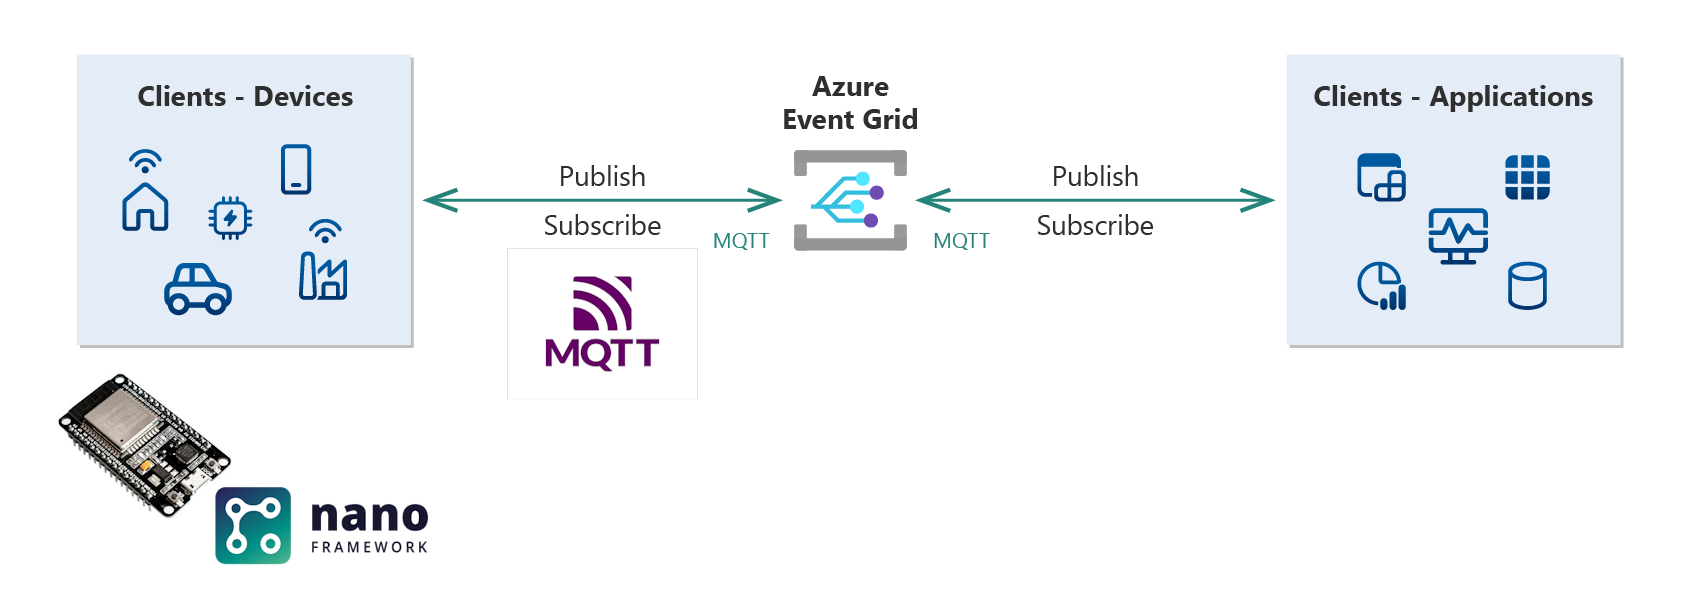
Let’s see how we securely connect an ESP32 and have it communicate over plain MQTT.
Considerations
The code used in this article is also available on GitHub.
If you want to use it in a more production-like environment, please take some time to ruggedize it accordingly.
I want to give credit to Roman Kiss. His post helped me with the client certificate construction.
This post is part one of a series of posts regarding the EventGrid namespace support for MQTT:
- A first look at Azure Event Grid MQTT support
- Connect ESP32 to EventGrid over MQTT with Nanoframework
Steps
These are the steps to perform:
- Register a device client in the MQTT broker
- Collect the right certificates, all three…
- Make the ESP32 ready for programming
- Get the NanoFramework MQTT client repo and fill in the blanks
- Test the solution
The cloud part is not described in detail.
Check out this post about all the MQTT broker abilities. It also explains the registration of the clients in detail.
So, find yourself an ESP32 and follow along. Go explore.
Register a device client in the MQTT broker
We start with creating a device client registration in the EventGrid MQTT broker.
If the MQTT option is enabled in an EventGrid Namespace, you can register a device client:
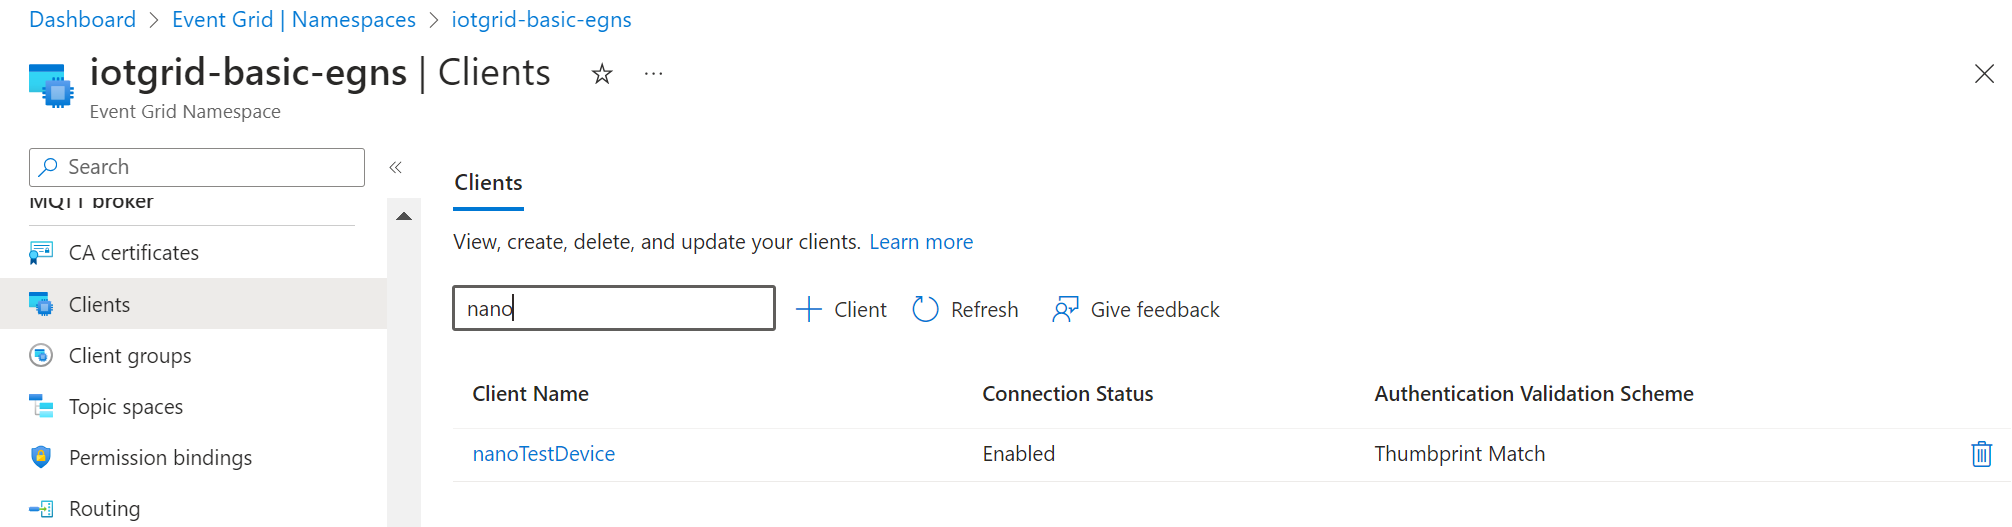
Notice the client authentication name is set to ‘nanoTestDevice’. We need this value later on.
My device client will use ‘thumbprint match’ validation for the authentication while connecting.
The client-specific thumbprint must be filled in, in the Azure Portal:
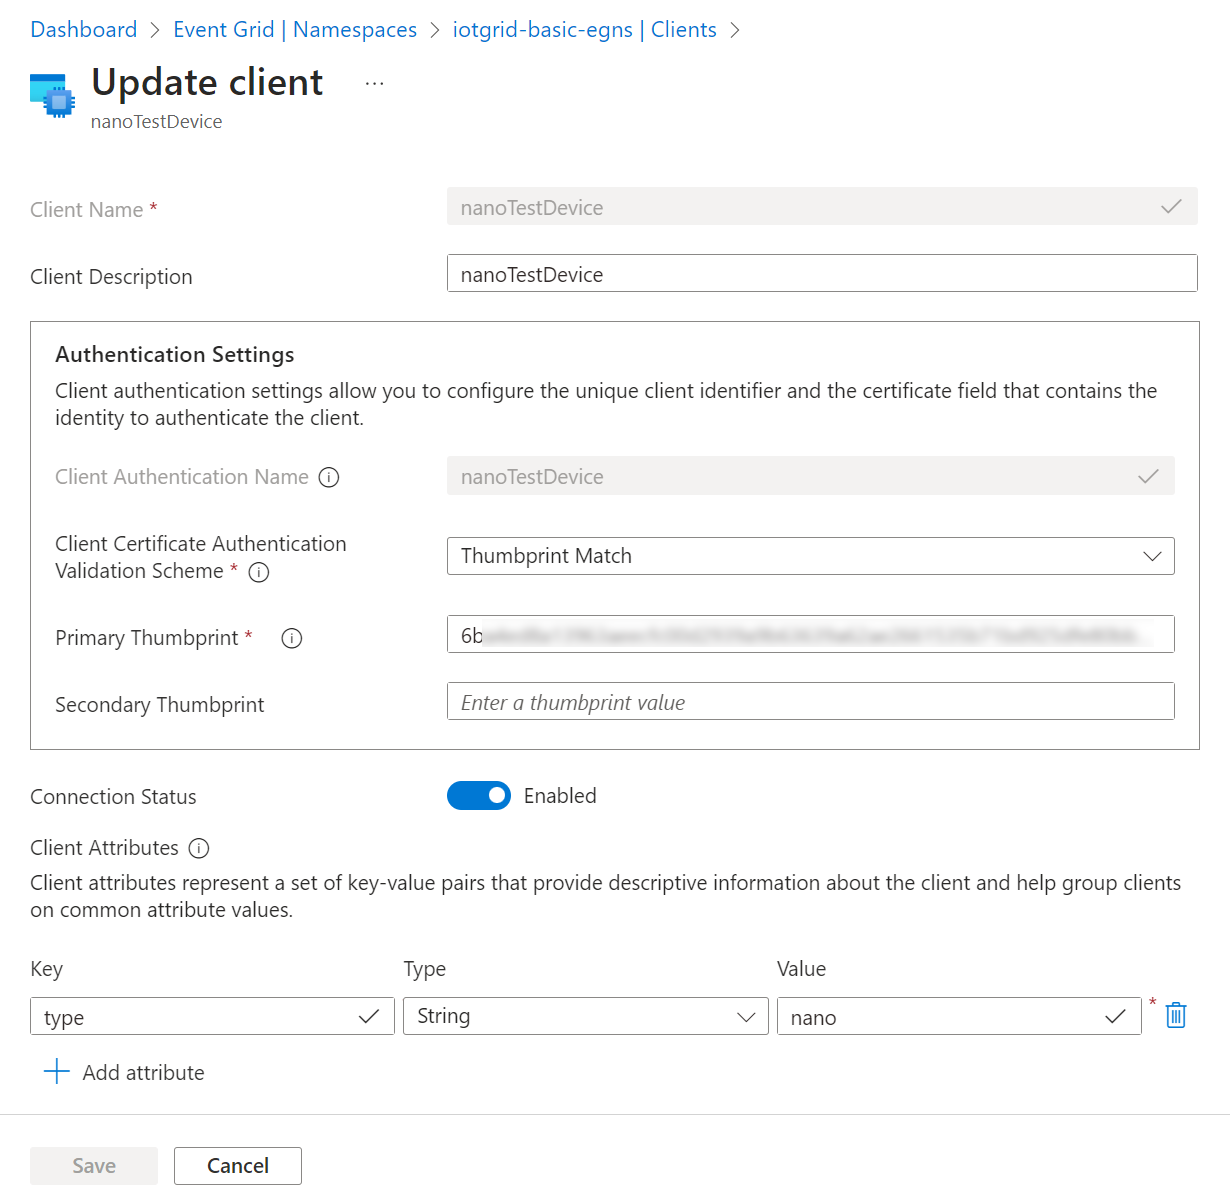
That thumbprint is derived from an actual private client certificate, created upfront:
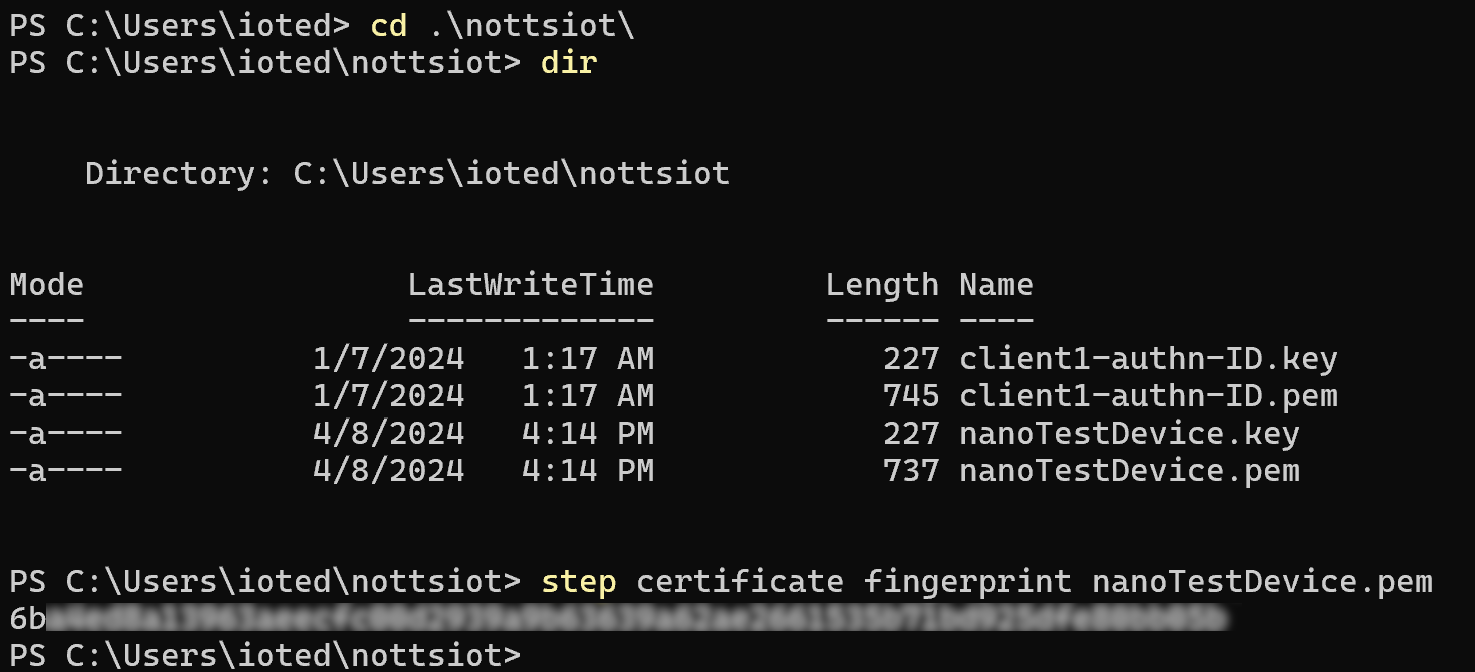
As you can see, each client has a private and public X509 certificate (two separate files).
This is something to remember for the next step, as seen below.
Check the post regarding additional MQTT broker client groups, Topic templates, Topic Namespaces, and Permission binding. These are skipped in this post. If you want to test it yourself, we will use one publisher topic and one subscriber topic below in the demonstration.
At this point, we have a MQTT broker client registration, based on X509 certificates.
Collect the right certificates, all three…
As seen in my previous post about the MQTT broker, all demonstrations with clients were based on X509 certificates.
The MQTT cloud broker does not support name/password authentication (yet).
So, we need access to the content of both the private key (nanoTestDevice.key) and public key (nanoTestDevice.pem) of the device client when we want to connect to the MQTT broker.
But there is one more certificate to cope with!
The communication between the MQTT client and the MQTT broker is encrypted using a TLS certificate.
You can check which TLS certificate is used via:
openssl s_client -connect [your EventGrid Namespace].westeurope-1.ts.eventgrid.azure.net:8883Here you see the DigiCert Global Root G3 is used:

We need the public key so we can make use of the right encryption.
The public key (the DigiCertGlobalRootG3.crt.pem file) can be found here.
Note: Please double-check any security key you download yourself from the internet. These are sensitive so keep an eye on your own security.
The question is why do you need to care for this TLS certificate yourself…
In more generic operating systems like Windows or Linux, your operating system takes care of these public certificates and stores them somewhere on the OS (in one or more ‘certificate stores’). These are then automatically used by your browsers, etc.
For constrained devices, normally there is no certificate store available. To save (memory) space, you are in full control of which certificates are uploaded. It’s your responsibility.
This also means that your TLS communication will not work anymore when the root certificate is revoked or expired. So be sure to know what risks you take with pinning.
Now, at this point, we have three certificates, all needed for both securing the communication channel and authenticating.
Make the ESP32 ready for programming
If this is the first time you use the Nanoframework, there are a couple of steps to take before you can program on the ESP32.
First, we download the Nanoframework firmware flasher and use it to flash our ESP32 with a blank Nanoframework:
dotnet tool install -g nanoff
dotnet tool update -g nanoff
nanoff --serialport COMXYZ --update
nanoff --serialport COMXYZ --devicedetailsNote: you need to have the full .Net framework installed on your development machine to make use of this installer.
I had to use COM7 for my device.
Note: Other types of devices are supported too but I’m demonstrating the ESP32 in this post.
Then, open Visual Studio and install the Nanoframework extension:

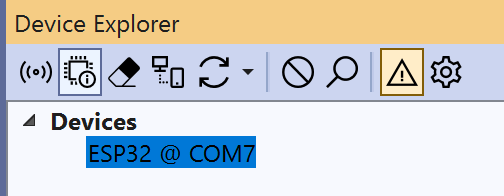
After the installation, you can see your ESP32 being listed in the Device Explorer view:
Finally, open a sample project based on the default NanoFramework console app:
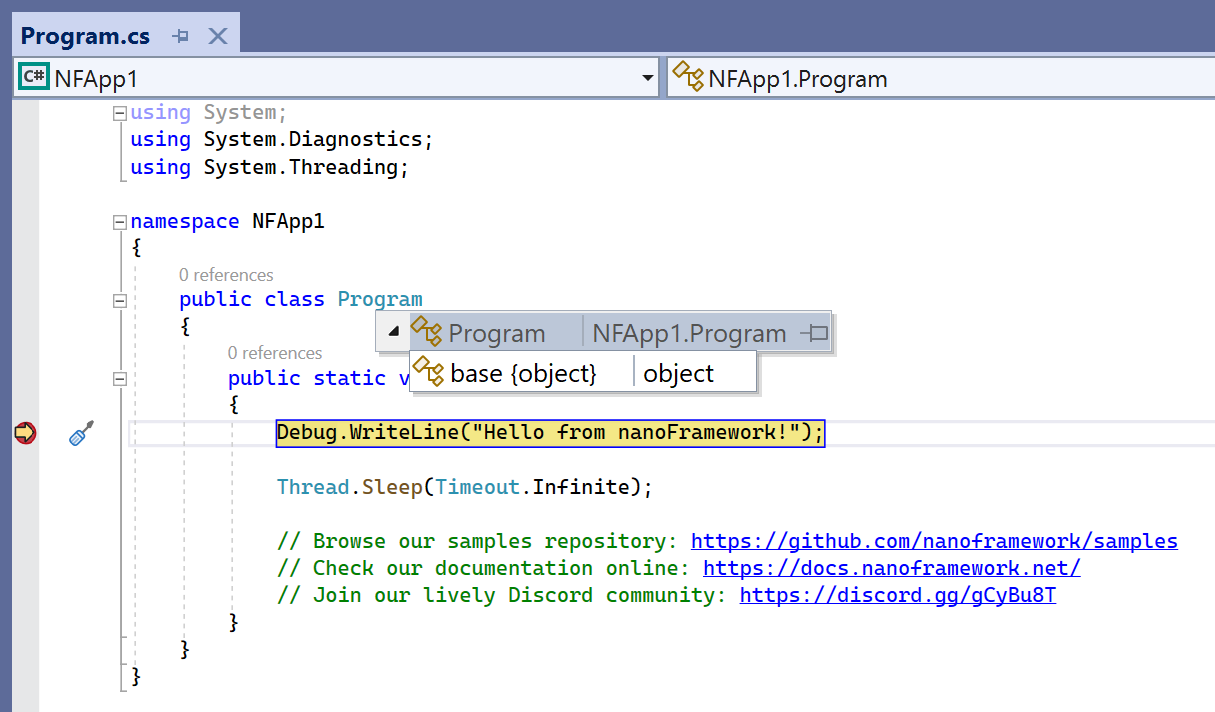
You can place a breakpoint and flash the application to the ESP32 by simply running it (use there F5 key or start button).
If you encounter any errors, this is most likely due to an update needed for the ‘mscorlib‘ package.
Just install/update the nanoframework.CoreLibrary and try again:

At this point, you can program your ESP32 using C# in Visual Studio.
We are ready to do some MQTT magic!
Get the NanoFramework MQTT client repo and fill in the blanks
Make sure you have the GitHub tooling installed on your programming environment.
Use your favorite GitHub client, Visual Studio, or just the Dos prompt to clone this repository on your development environment:
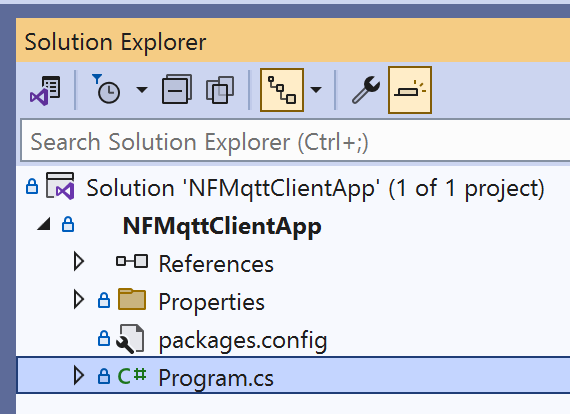
git clone https://github.com/sandervandevelde/Nanoframework-Cloud-MQTT-Broker-support.gitThis gives you access to this full NanoFramework project for MQTT client support:
Before you can run it though, we need to supply a couple of constants:
- Wi-Fi SSID and Wi-Fi password so your ESP32 can make a wireless connection to the cloud.
- The device client Id. This is the name of the client authentication name. In my case, this is ‘nanoTestDevice’.
- You need to fill in the correct ‘MQTT hostname’ URI of your MQTT broker (make sure there is a ‘.ts.’ in there, opposite to the HTTP hostname).
- The port is 8883 and not negotiable.
- The topic for publishing messages is set to ‘message/fromnanoframework’. Change it if needed.
- The demonstration also subscribes to the topic ‘message/device/#’. Change it if needed.
We are almost there…
Do you remember those three certificates?
You have three (text files) so open them and copy the content of each file separately.
Paste the text blocks into the related constant string, found in the specific certificate region:
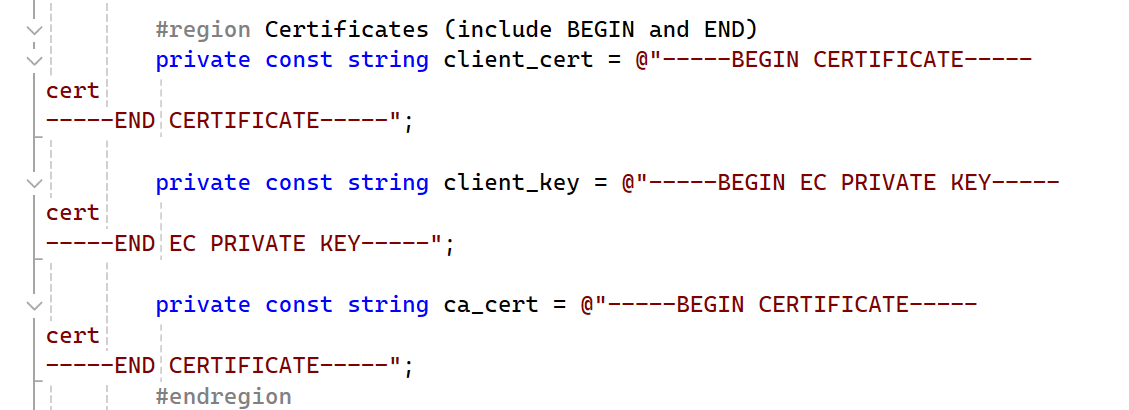
Make sure these keys start and end with the “BEGIN” and “END” lines as seen in the original key files. Do not add extra spaces or tabs inside the text blocks to attempt some indentation.
Now, the code is ready to be executed.
Test the solution
Run the MQTT client application.
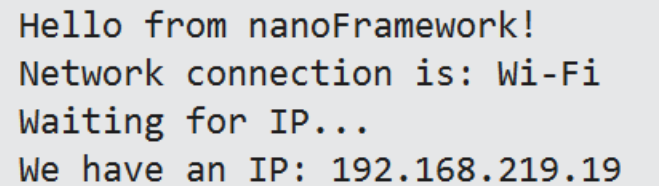
First, the application tries to connect to the Internet via Wi-Fi:

You can look into the method to see how it’s connecting.
The result should be that the ESP32 gets an IP address on the local network:
Next, we connect to the MQTT broker:
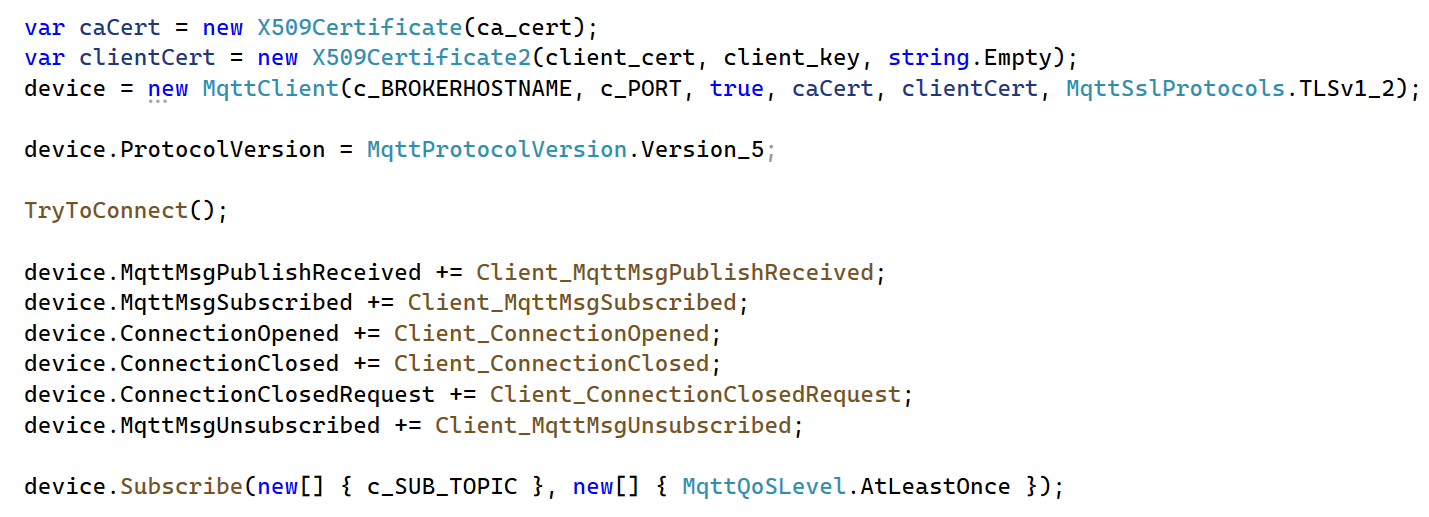
We first turn the three certificate texts into two ‘X509’ certificates.
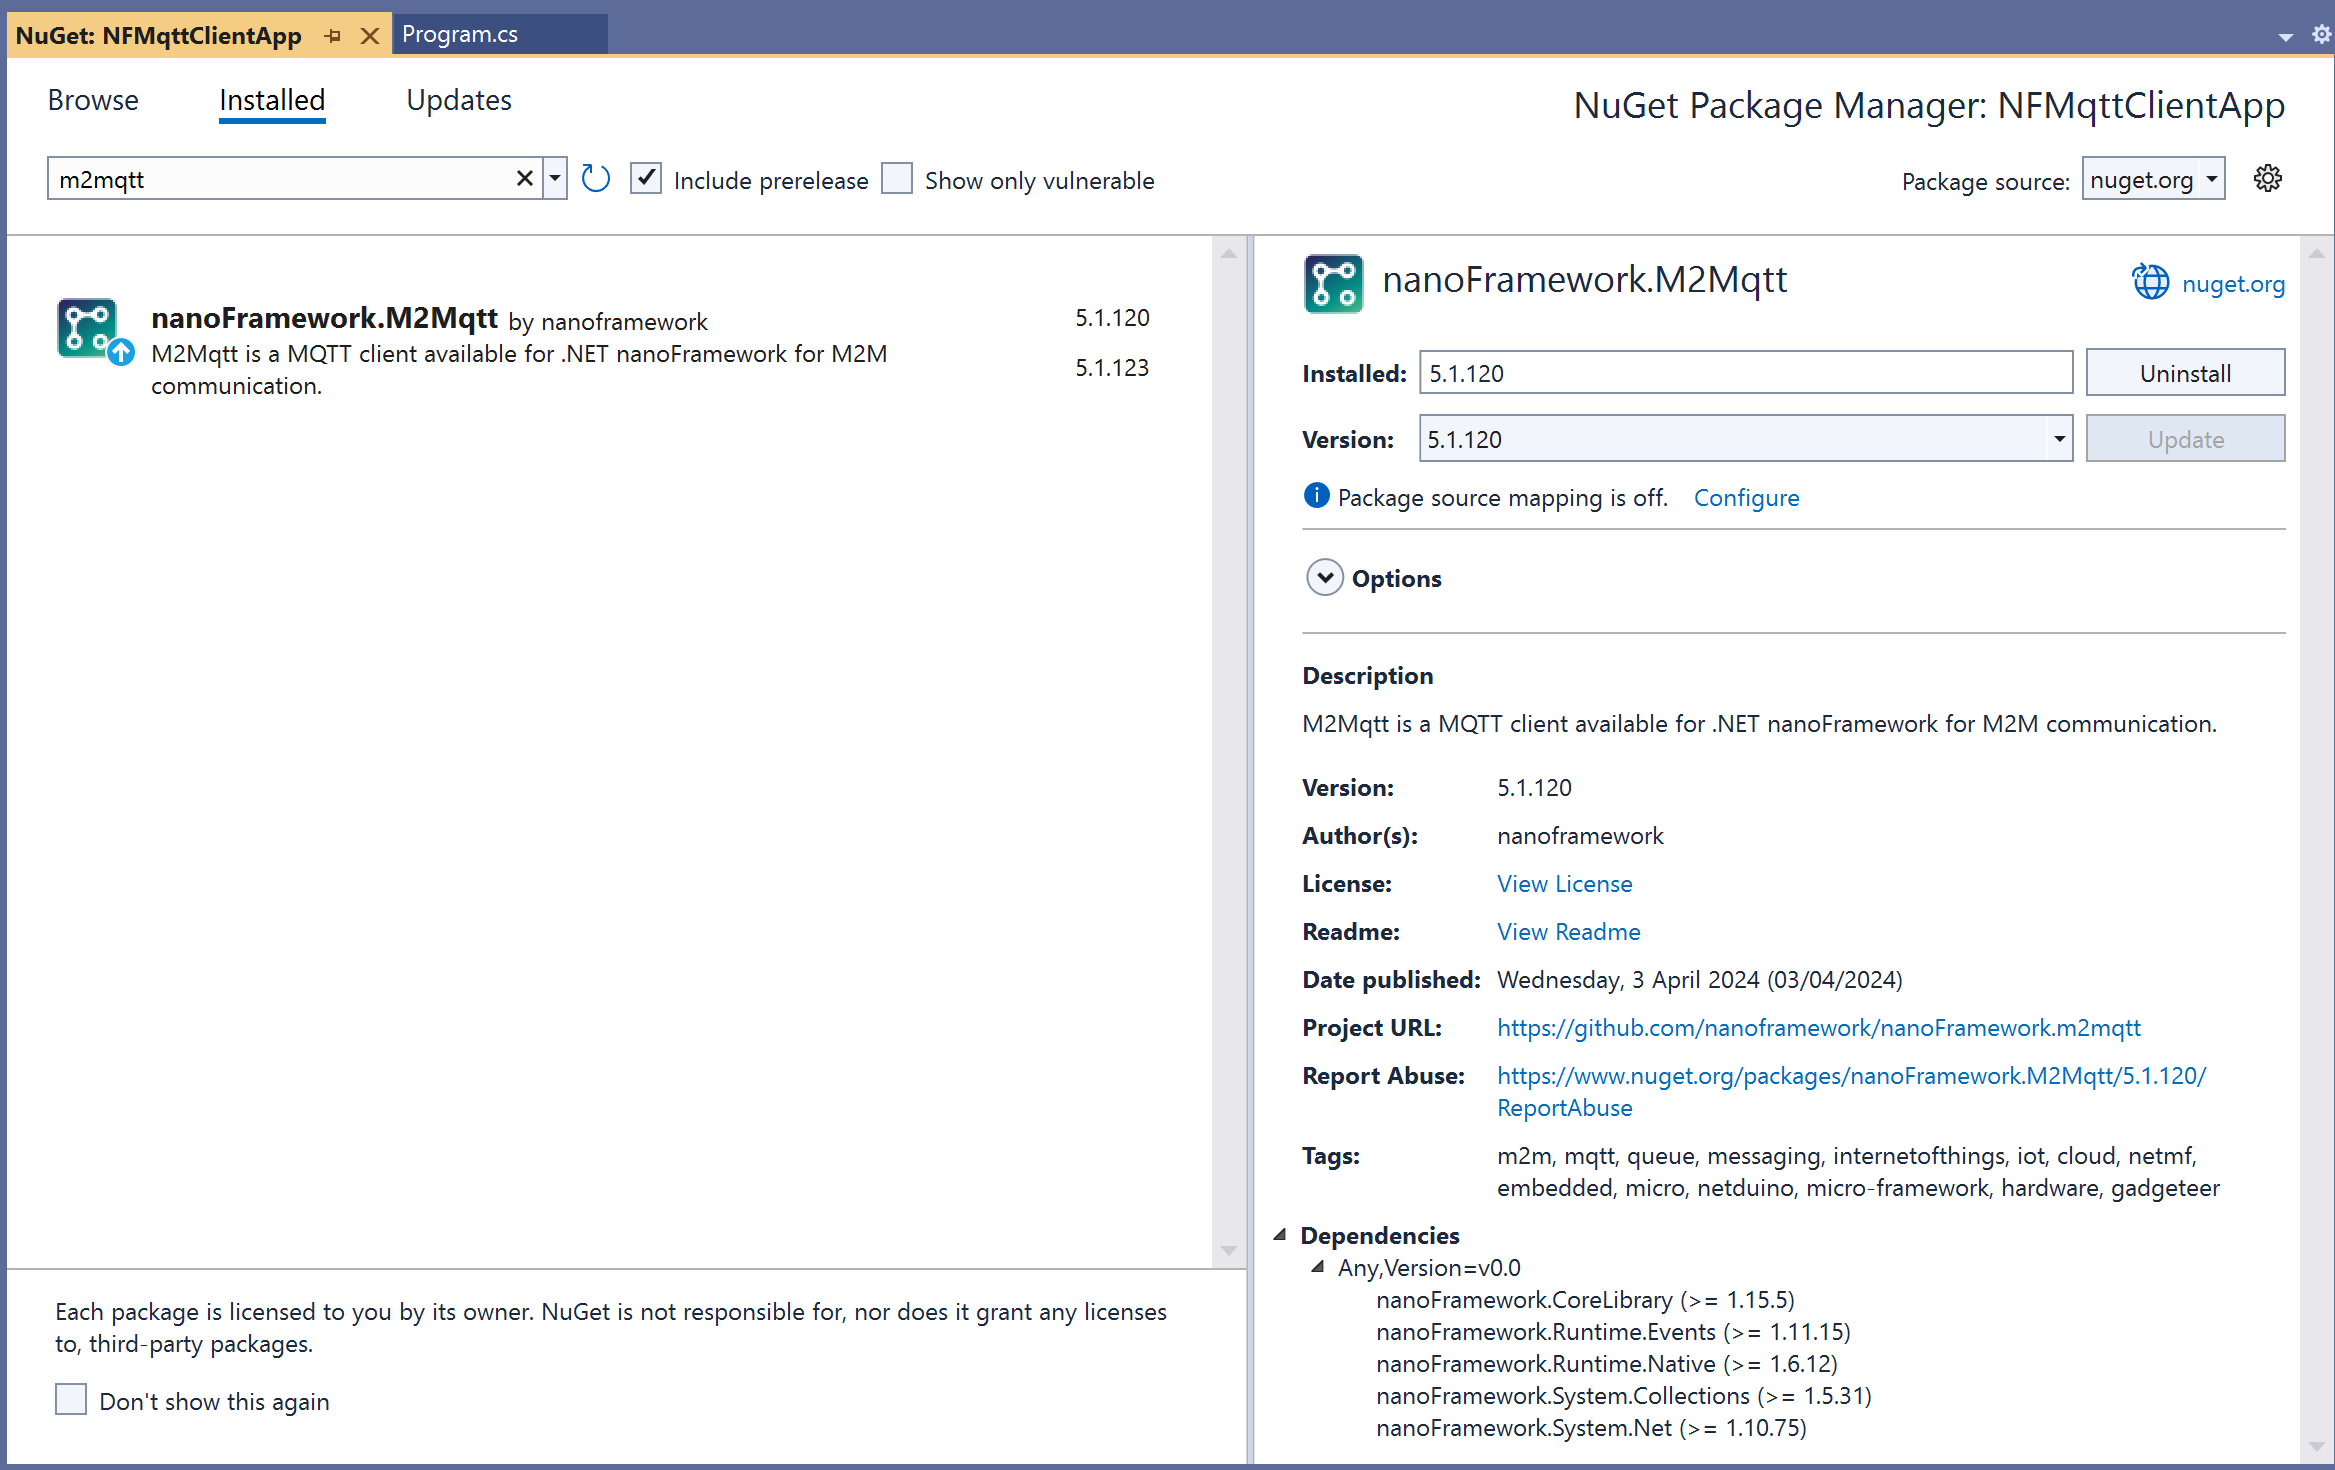
We then create a MQTTClient, based on this M2MQTT Nuget package:
We supply the broker URI, the port, and the two certificates (one for authentication, one for TLS security) while constructing the client.
We force the client to use MQTT5 in this case.
Then we try to connect using our device client registration, bound to the client certificate:

Note: This code can survive a WI-FI interruption although it is not hardened that well for production situations.
Just for fun, I register for a couple of connection and subscription events so we get a grasp of what is happening next:
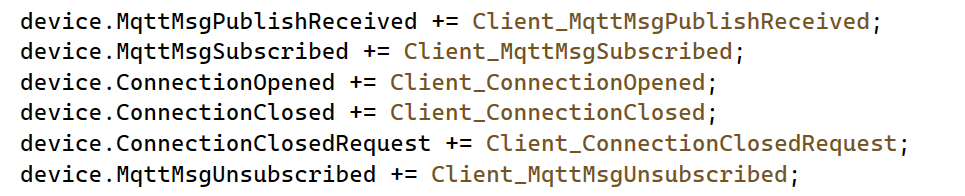
We also subscribe to a subscription topic:

Notice the following event handler will be triggered when a message arrives:
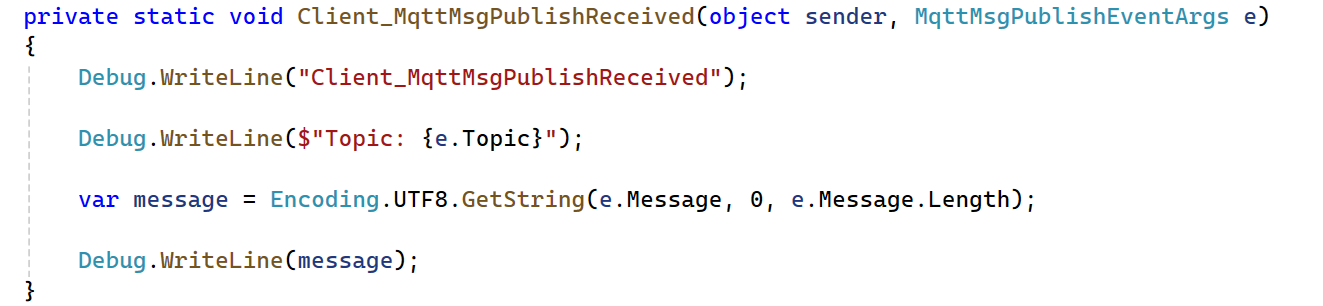
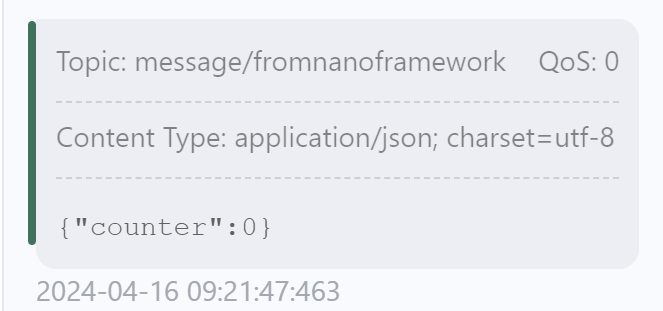
Finally, we send messages to the MQTT broker and beyond (to every device listening):

See the output of what is happening:
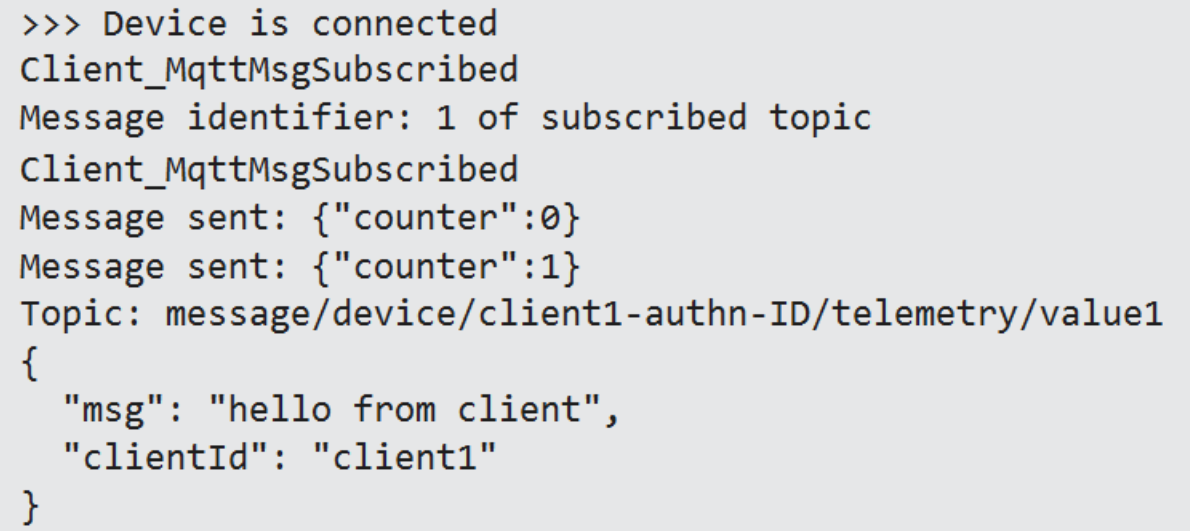
The device is connected, is subscribed to a topic, and starts sending (two) messages.
Finally, an incoming message shows up.
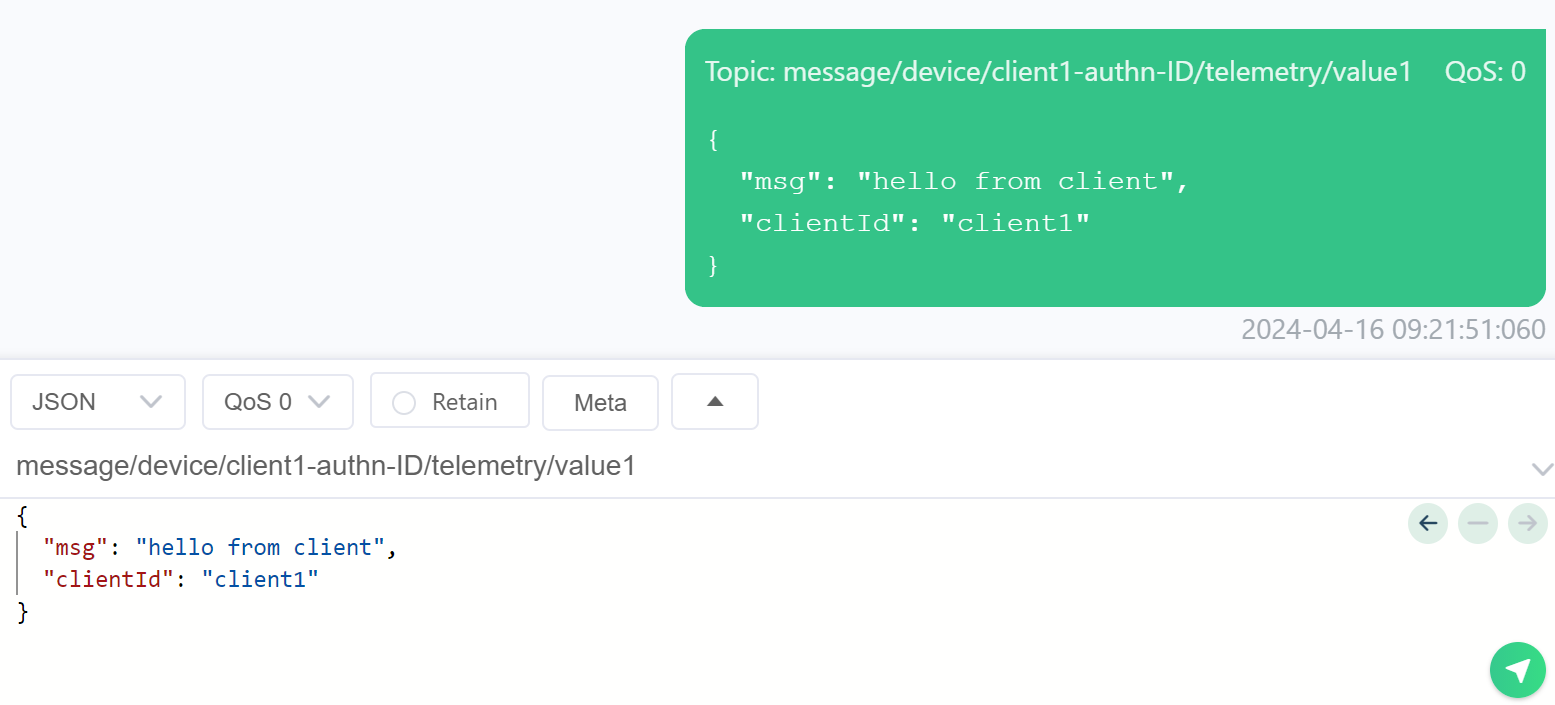
Using a second client, we see the published messages sent by our MQTT client arrive at that client:
The received (subscribed topic) message was also sent by that second client:
Conclusion
We have experienced how to set up a working NanoFramework client for the new EventGrid MQTT broker.
It must be clear how to both secure the connection and authenticate using certificates.
We can both publish outgoing messages and subscribe to incoming messages.
Bonus: LWT
Although the MQTT5 basics are demonstrated, it’s up to you to test more detailed features like “last will and testament“:
Event Grid is committed to ongoing investment in MQTT features to align with MQTT specifications and better support evolving IoT scenarios, ensuring continuous enhancement to meet industry demands.
LWT is added to the demonstration application. Just uncomment the related lines.
While the application was running on the ESP32, I cut the power.
A couple of seconds later, this message was received by another device registered to the LWT topic:

Notice the ‘WillRetain’ flag is set to false. That specific MQTT feature is not supported yet by the EventGrid Namespace.

Een gedachte over “Connect ESP32 to EventGrid over MQTT with Nanoframework”
Reacties zijn gesloten.