IoT Central supports multiple devices at this moment if you start a new IoT Central application:
- Raspberry Pi
- MXChip Developer kit
- Windows 10 IoT Core device

But what if you have other types of devices you want to connect?
Luckily, Microsoft offers help in the form of a GitHub repository. These you find the source code for the devices shown above and several other devices.
This repository is a great way if you want to start connecting with IoT Central with:
- ESP32
- ESP8266
- MBED OS 5.X+ basic example
- HTTP Only
If your device is not shown at the top of this list, you can fall back on HTTP only as long as your device is capable of executing REST calls.
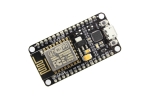
In this blog, we check how well the cheapest device is supported. This is the ESP8266. You can get an ESP8266 for less than three dollars so this is a fun and easy way to start using IoT Central.
Serial port
To program your ESP, attach it with a USB cable to your laptop. Please check if it’s recognized, it should appear in the Device manager:

Note: if it doesn’t appear, restart your PC and try again. Also, check your USB cable; it must be able to transport data.
Attaching your ESP to the Arduino IDE
In GitHub, you can find a very minimal manual on how to use the sketch provided.
When the manual is referring to ‘additional board manager’, you first have to add the URL provided to the preferences of the Arduino IDE tool:

After that, in menu Tools | Board | Board Manager you can add the ESP board library:

Only then you can select the NodeMCU 1.0 (ESP-12E) board. Also, Do not forget to select the right serial port as seen device explorer:

The Sketch
Microsoft provides a simple and straight-forward sketch:
https://github.com/Azure/iot-central-firmware/blob/master/ESP8266/ESP8266.ino
I checked it out and I suggest two minor improvements:
1. Simplify the message sent and set another interval
The original code sends a message with one value and a ‘property’ (a special kind of telemetry message) one after the other (line 58-71). We just stick with one telemetry message with the two values in it:
if (ms - lastTick > 5000) {  // send telemetry every 10 seconds
  char msg[128] = {0};
  ...
  pos = snprintf(msg, sizeof(msg) - 1, "{\"accelerometerX\": %d, \"dieNumber\":%d}", 10 + (rand() % 20), 1 + (rand() % 5)); errorCode = iotc_send_telemetry(context, msg, pos);
Because of more characters being added to the message, the size of ‘msg’ is increased.
And the interval is set to once every five seconds.
2. Show the arrival of ‘settings’
The original code was not aware of ‘settings’ (line 39-41). Let’s add some awareness:
  if (strcmp(callbackInfo->eventName, "Command") == 0) {
    LOG_VERBOSE("- Command name was => %s\r\n", callbackInfo->tag);
  }

  if (strcmp(callbackInfo->eventName, "SettingsUpdated") == 0) {
    LOG_VERBOSE("- Setting name was => %s\r\n", callbackInfo->tag);
  }
The use of settings is explained below…
This results in this updated sketch:
This file contains bidirectional Unicode text that may be interpreted or compiled differently than what appears below. To review, open the file in an editor that reveals hidden Unicode characters.
Learn more about bidirectional Unicode characters
| // Copyright (c) Microsoft. All rights reserved. | |
| // Licensed under the MIT license. See LICENSE file in the project root for full | |
| // license information. | |
| // This gist is based on https://github.com/Azure/iot-central-firmware/blob/master/ESP8266/ESP8266.ino | |
| #include <ESP8266WiFi.h> | |
| #include "src/iotc/common/string_buffer.h" | |
| #include "src/iotc/iotc.h" | |
| #define WIFI_SSID "[your network WIFI ssid]" | |
| #define WIFI_PASSWORD "[your network WIFI password]" | |
| const char* SCOPE_ID = "[device connection scope id]"; | |
| const char* DEVICE_ID = "[device connection device id]"; | |
| const char* DEVICE_KEY = "[device connection primary or secondary key]"; | |
| void on_event(IOTContext ctx, IOTCallbackInfo* callbackInfo); | |
| #include "src/connection.h" | |
| void on_event(IOTContext ctx, IOTCallbackInfo* callbackInfo) { | |
| // ConnectionStatus | |
| if (strcmp(callbackInfo->eventName, "ConnectionStatus") == 0) { | |
| LOG_VERBOSE("Is connected ? %s (%d)", | |
| callbackInfo->statusCode == IOTC_CONNECTION_OK ? "YES" : "NO", | |
| callbackInfo->statusCode); | |
| isConnected = callbackInfo->statusCode == IOTC_CONNECTION_OK; | |
| return; | |
| } | |
| // payload buffer doesn't have a null ending. | |
| // add null ending in another buffer before print | |
| AzureIOT::StringBuffer buffer; | |
| if (callbackInfo->payloadLength > 0) { | |
| buffer.initialize(callbackInfo->payload, callbackInfo->payloadLength); | |
| } | |
| LOG_VERBOSE("- [%s] event was received. Payload => %s\n", | |
| callbackInfo->eventName, buffer.getLength() ? *buffer : "EMPTY"); | |
| if (strcmp(callbackInfo->eventName, "Command") == 0) { | |
| LOG_VERBOSE("- Command name was => %s\r\n", callbackInfo->tag); | |
| } | |
| if (strcmp(callbackInfo->eventName, "SettingsUpdated") == 0) { | |
| LOG_VERBOSE("- Setting name was => %s\r\n", callbackInfo->tag); | |
| } | |
| } | |
| void setup() { | |
| Serial.begin(9600); | |
| connect_wifi(WIFI_SSID, WIFI_PASSWORD); | |
| connect_client(SCOPE_ID, DEVICE_ID, DEVICE_KEY); | |
| if (context != NULL) { | |
| lastTick = 0; // set timer in the past to enable first telemetry a.s.a.p | |
| } | |
| } | |
| void loop() { | |
| if (isConnected) { | |
| unsigned long ms = millis(); | |
| if (ms – lastTick > 5000) { // send telemetry every 5 seconds | |
| char msg[128] = {0}; | |
| int pos = 0, errorCode = 0; | |
| lastTick = ms; | |
| pos = snprintf(msg, sizeof(msg) – 1, "{\"accelerometerX\": %d, \"dieNumber\":%d}", 10 + (rand() % 20), 1 + (rand() % 5)); | |
| errorCode = iotc_send_telemetry(context, msg, pos); | |
| msg[pos] = 0; | |
| if (errorCode != 0) { | |
| LOG_ERROR("Sending message has failed with error code %d", errorCode); | |
| } | |
| } | |
| iotc_do_work(context); // do background work for iotc | |
| } else { | |
| iotc_free_context(context); | |
| context = NULL; | |
| connect_client(SCOPE_ID, DEVICE_ID, DEVICE_KEY); | |
| } | |
| } |
You can already fill in the WIFI credentials: SSID and password.
You can try to compile it already but do not try to deploy it yet: the Device credentials are not set yet.
Device template
Ok, so you have a device, you have this sketch which can expose data to IoT Central but you need credentials for your device to communicate securely.
And to get credentials, you need to register your device first.
And to be able to register a device, you first need to tell IoT Central how you expect to interact with this kind of devices. Yes, IoT Central is expecting your device to be part of a group of devices, all with the same interaction. This is called a Device Template.
So we need a Device Template for our device in IoT Central:

Here I added a device template called ‘esp’ and I added two Telemetry items (as seen in the GitHub gist at line 69).
Once saved, you can register your device. Go to the IoT Central Device Explorer, select the ‘esp’ template and add a ‘real’ device:

After the creation, press the ‘Connect’ button to see the device credentials, needed for the sketch:

Copy these credentials into the sketch, compile it and deploy it to your ESP device. This can take up to a minute.
Telemetry
If everything goes well, you will see the arrival of telemetry very soon:

Nice, not bad for a three dollars device.
Note: You will see new messages arriving every 10-15 seconds. And that’s at a slower pace than sent to IoT Central by your device. IoT Central is using a throttle mechanism to protect its resources.
You are now able to build fantastic dashboards for your devices, add some rules, etc. Yes, this cheap device behaves just like an expensive device. And yes, you can even do C2D communication!
Let’s check that out.
Commands
Check out sending commands. If you have a live connection with your device, you are able to send commands. First, declare a new command in the device template:

I added two separate input fields to this command. Once saved, we can send a command in the Device Explorer for our device:

In the Serial monitor of the Arduino IDE you see the execution of the command:

We have successfully sent a command from cloud to device. But what about a return value? The text in the device template manual gives no clear answer. But this recent response to a customer feedback item suggests there is no support for a response yet. And the sketch is certainly not supporting it.
Update: After having that conversation, this faulty behavior is seen as part of the limitations of this device. Yes, it’s cheap and simple. If somebody knows a solution for this problem, please share it with the world 🙂
Settings
Commands are great if your device is connected live. But a low-powered device like this ESP is normally not that often full-time connected to the cloud.
For this purpose, IoT Central supports settings. These are in fact device twin updates, capable of being handled after some delay!
Now, let’s define some settings in the Device Template:

I added an integer value and a toggle (true/false). Notice the time reference…
This is how the settings are shown in the Device Explorer:

I send two values at once by changing them both and pressing the Update button. I get green messages, the values are sent.
And we see the arrival of both settings in the serial monitor:

I even checked the ‘offline’ capabilities. I disconnected my device before sending a setting update. Once connected again, the setting values were picked up but the device crashed. Only when the device template only holds one setting, the setting is processed correctly and telemetry is flowing in. I filed an issue for this.
Block / Unblock
The last feature of IoT Central I want to demonstrate is the block/unblock capabilities.
The administrator is able to (temporarily) block a device. If the administrator blocks our device, it is not able to connect to the IoT Central (DPS/IoTHub) anymore:

This results in this logging in the device:

The administrator can later decide to unblock the device again. Once the device is unblocked, it connects, gets the current settings and starts sending telemetry once again.
Conclusion
As you can see, you are now able to connect a really cheap device to IoT Central. This is great for rapid prototyping of for your home projects.
So visit https://apps.azureiotcentral.com/create and start creating your IoT solution. And to make it extra attractive, you can connect up to five devices for free:

